
Actually there are several ways how to emulate JunOS routers using GNS3 and make to usable them for advanced networking topologies. So, be able to make and run JunOS inside of GNS3 we could use:
- qemu
- virtualbox
- vmware
as the cost effective variance we prefer use open and free software, therefore we are focusing on the qemu and Vitrualbox. Here again we have several oportunities, how to prepare virtual junos router, all of them require preinstalled FreeBSD OS. Preparing FreeBSD virtualized VM we are able install a junos package than. I, as a newbie, have been tested some of mentioned opportunities. So, first of them, I’m using qemu.
Using qemu to run Junos router inside of GNS3
Prerequisities and environment
All components are running inside of my Win 7 64 bit OS:
- Installed GNS3. I prefer to install version for win 64 bit. Download here. I’m using version 0.8.6. I’m using GNS3 version 1.2.3 now.
- Installed Qemu, 0.11. Win 32 version in my case. You can download it here. I’m using the one provided and installed together within GNS3 install package. We need the qemu as the virtualization technology used to make and run FreeBSD VM. The FreeBSD VM is then used as the platform where we install the main JunOS.
Steps
We have to, in general, follow the same steps:
- Create a qemu virtual machine
- Install the FreeBSD operating system on it (4.11).
- Install a Junos package
- the one which is preprepared. Usually named OLIVE.
- the one which we have to modify and which is based on the domestic-signed JunOS package.
- Import the junos qemu machine into GNS3 and build and run an example of topology.
Creating and installing a qemu machine with the FreeBSD OS
As the first step we have to create a qemu virtual machine. Inside of it we will install FreeBSD. The tutorial Installing FreeBSD for JunOS Olive using Qemu under Win 7 64bit is describing how to do it. For newer versions of junos OS we need to enlarge the disk size and its logical partitions. For Junos versions of 9, 10 and 11 is 4G enough, for versions 12 and higher should enlarge this up to 10G/12G.
Installing a main junos system
Now we will install a junos system inside of qemu FreeBSd virtual machine. Here again we have several ways available, all of them require junos installation package. On the net we may found different packages and tutorials how to do it.
Using an olive package
We may found Junos packages which are already preprepared to run inside of FreeBSD, all running inside of PC (real or virtual). This kind of Junos packages are so called OLIVE. The olive package we may usually install directly inside of FreeBsD machine. The tutorial
”
”
is describing how to do it.
Using a domestic-signed package
As the second possibility, we may on the net find original Junos packages, which are preprepared to run inside of real junos HW, all are signed with hash keys. These packages have to be modified before we may install them into a qemu FreeBSD machine. Here again many tutorials are available, however in my case there are not straightforwardly applicable as I always found kind of installing problem.
In general, many of them run GNS3/qemu inside of linux OS, i’m using windows, where at least ftp/scp/sftp service have to be supplied. Then we have to modify original domestic signed junos package and make them usable for a qemu machine to install. All tutorials proposes to change the resolving of checkpic binary of the pkgtool package.
One perfect tutorial, as “Installing Olive 12.1R1.9 under Qemu“, sugest omitt the usage of signed packages (it remove all keys and does not making tgz package with them) and also remove hardware platform checking. The steps described there sugest to modify two files (+INSTALL and +REQUIRED) and modify part of the check_arch_compatibility() function. I found required function only inside of junos packages version 10 and above, so the tutorial is not applicable for junos version 9 (for example 9.6 as I had access to).
Once I obtained a Junos package of such version I’ve made a tutorial (march, 2015), as the usual tutorials again did not precisely work for me. My working solution i’m describing here
”
”
Another excellent tutorial Olive reloaded or how to emulate Juniper routers describe how to modify package and generate new keys, thus making complete junos signed olive package. Personally for older versions of Junos I have used this tutorial, but I found there some unclear parts, especially inside of backward steps used to tar a new junos olive package. My working solutions i’m describing here
”
”
Note: Within my tutorials I’ve used freebsd 4.11 and junos domestic signed packages.
Making GNS3 tolopology of juniper routers using GNS3
Version GNS3 1.x
Adding a junos router (image)
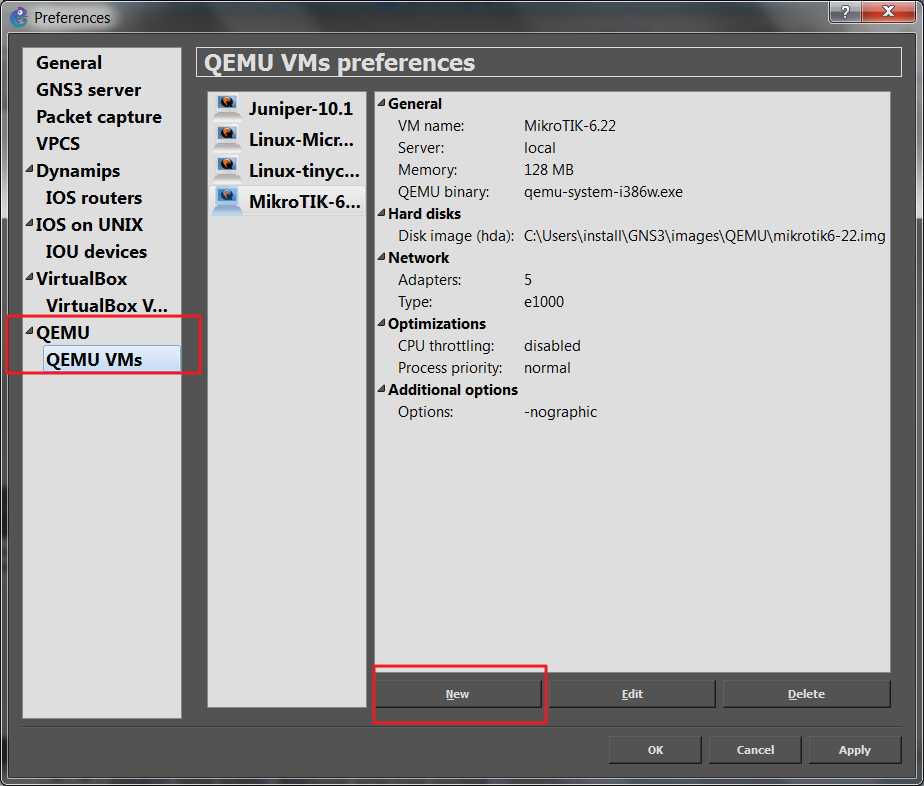
For version GNS3 1.x open a new project. Then go to:
Edit-->Preference-->qemu--> Qemu VMs
where you click on the New button
The window for adding a new Qemu machine will open, type a machine name which identify your router (here Junos-12.3R6.6)
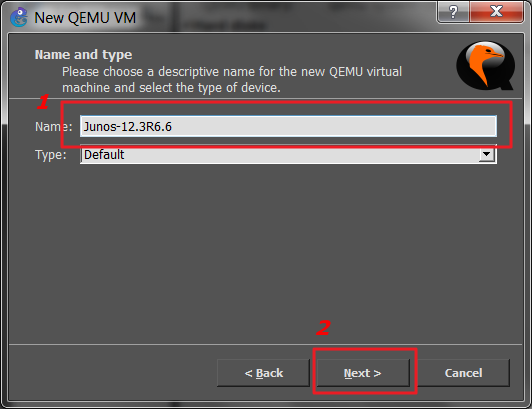
click Next. Then assign RAM memory, here 512MB, and check if GNS3 locates Qemu binaries correctly. If not, open a drop down menu and choose correct Qemu binaries. Click Next

Then select correct junos qemu image file (hard drive).
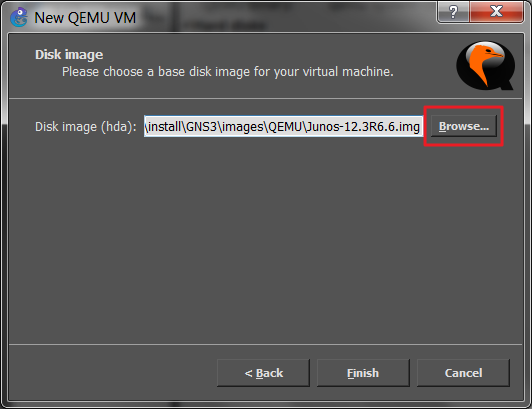
and finish adding a router clicking on the Finish button. The router is added.
Additonaly you may select it from the list and clicking on the edit button change the settings just we set (adding the number of adapters, -nographic options and so on.).
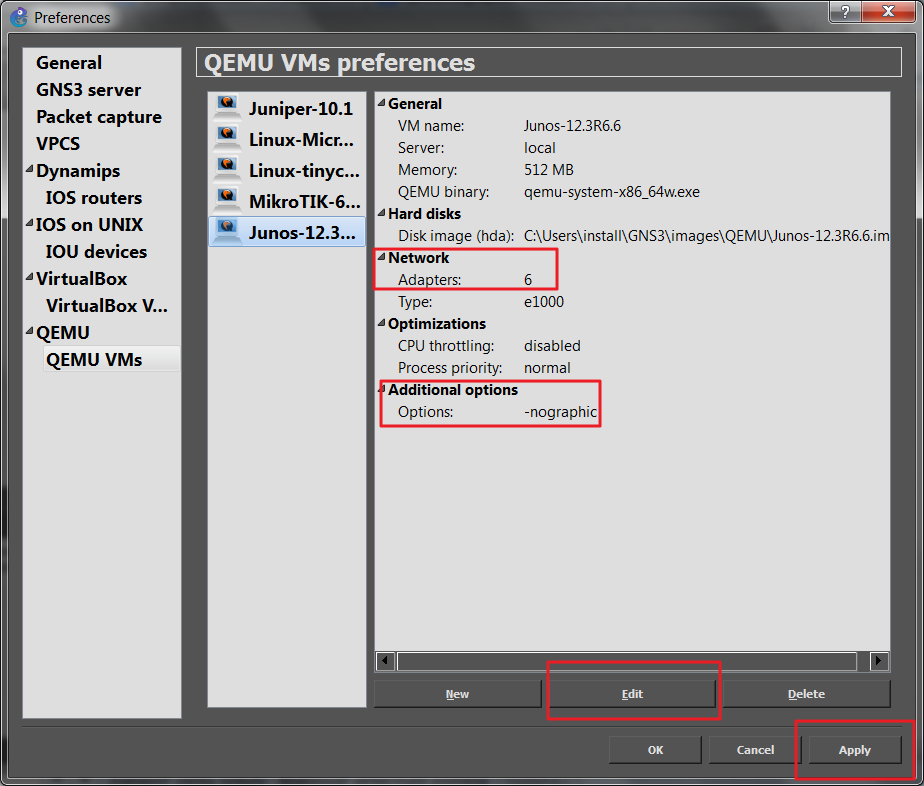
All is finished clicking on the Apply and Ok button.
Creating a topology
Now we are able drag the junos router from the left panel and drop them into working place. Choose interconnection type (eth0 to eth0) and start routers as we usually do:
1) click on the Browse all devices icon (red number 1)
2) select correct router, Junos-12.3R6.6 here
3) drop the devices on the workspace
4) select Add link icon (4)
5) interconnect routers (5)

Then click on the start icon (green triangle). The router will boot up, be patient, comparing to cisco ios it takes time. Access the router simply do a left double click on a selected device, putty window should immediatelly appears. Or use a context menu which is accessible afte right click on a desired router.

That is all. Now we may start to work and learn!
Version GNS3 0.x
Following quide is for an older versions of GNS3. However even works for a newer one, version of 1.xx
Qemu checking
First of all we shoud check if our GNS3 may correctly call qemu exe files, so go:
Edit-->Preference-->qemu--> General settings
and check if there are correct paths to the qemu.exe and qemu-img.exe. Finally, test the settings clicking on the Test settings button. If everything is OK, the green message should appear telling us that all components have correctly started. If there is some error message, correct the settings:

Adding Junos image
Now we may start to build a topology using our qemu build junos router running inside of our GNs3 topologies. So, first add the junos router into the qemu junos router list. To do that go inside of GNS3 to the menu with Qemu preferences
Edit-->Preference-->quemu-->junos-->add the juniper image
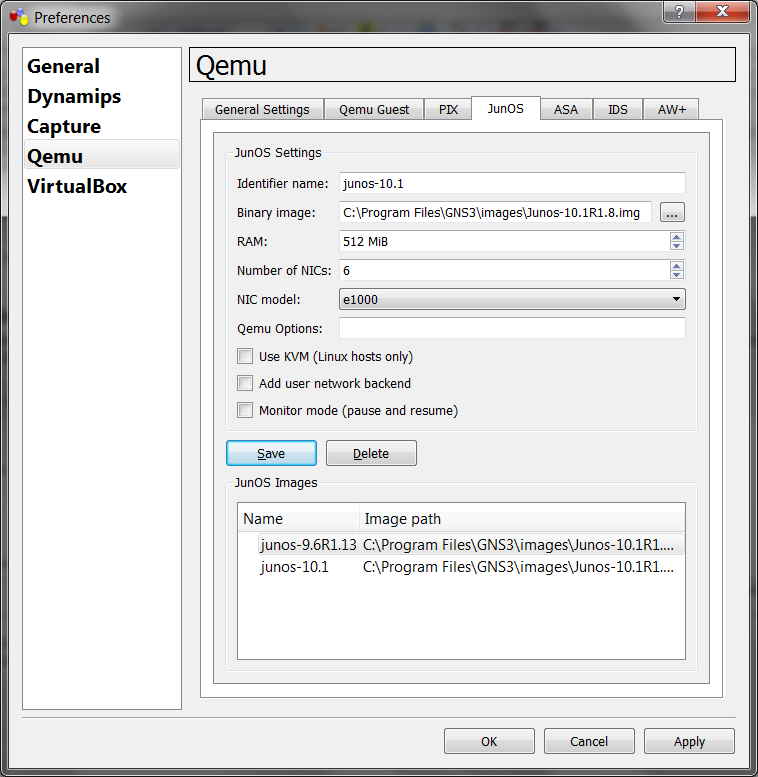
and fullfill required fileds:
Identifier name: put your router name (here junos),
binary image: setup correct path to the junos image file,
RAM: assign required menory size, may leave blank, GNS3 assign, as in my case, 512MB
Number of NICs: default 6
NIC model: e1000
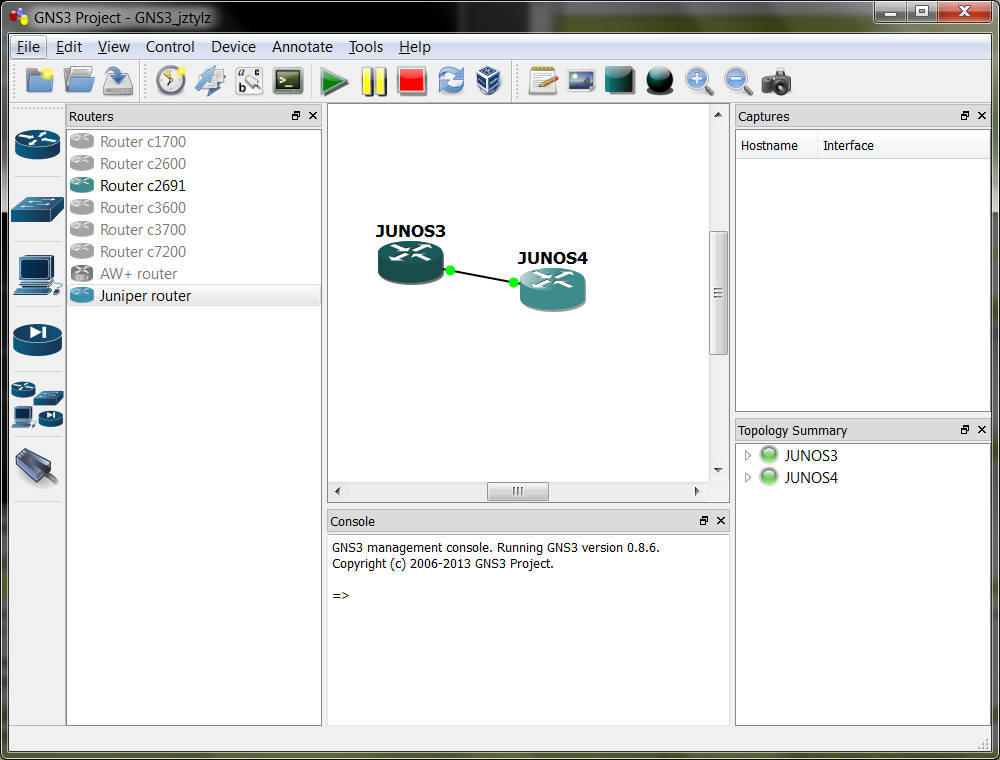
Then click Save and close the window with Apply. Now we are able drag the junos router from the left panel and drop them into working place. Choose interconnection type (em0 to em0) and start routers as we usually do (choose device and click on the start icon)
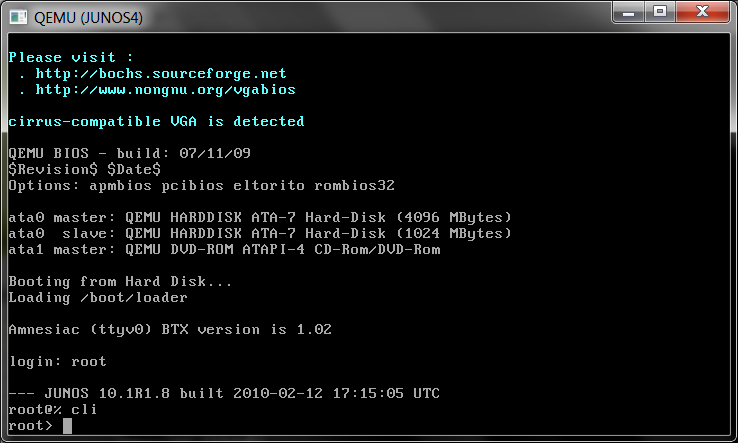
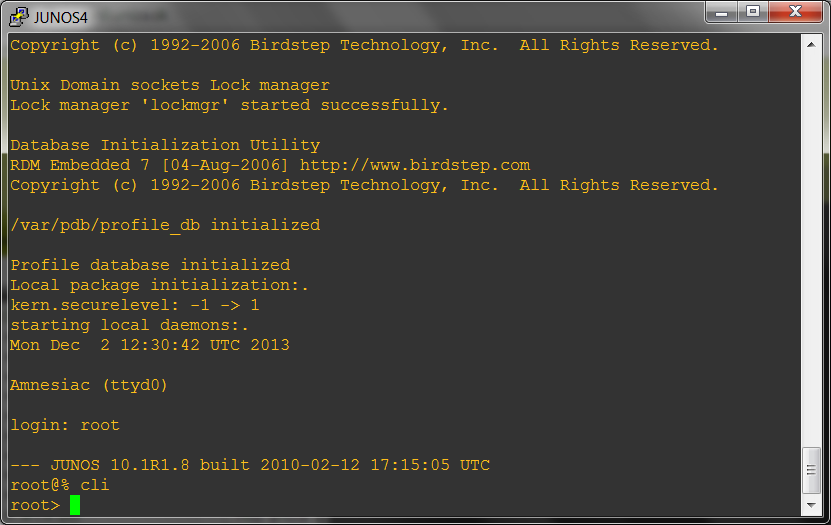
Immediatelly qemu window (-s) will open. Now we shoud wait for a time till the Junos router image will boot, and then the login prompt will be available:
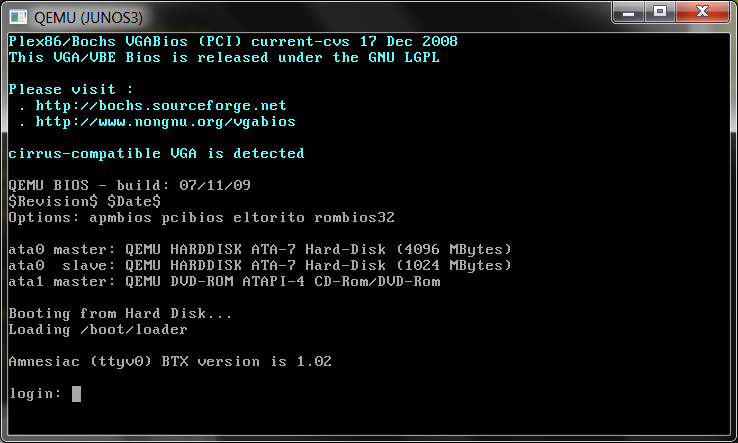
using our install login name (here root) we will log in into the junos router
or we may observe booting and login using telnet window, so do ricght click on the device and choose console,
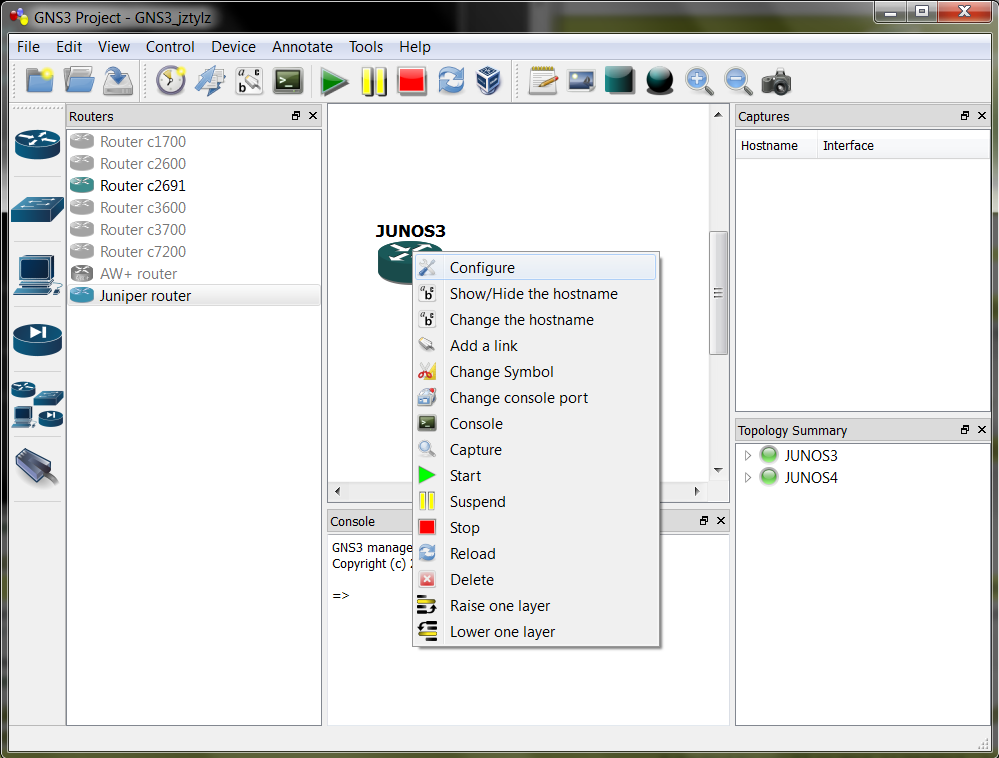
immediatelly window with telnet open and we may observe there booting process and at the end, we are able to login
Now we may start to configure our router boxes.