
In this post we describe how to run Fortigate FW VM appliance inside of the GNS3 (local or remote).
Prerequisities and environment
- GNS3
- In my case of version 2.1.1 running on a remote linux server (physical HW, not GSN3 VM).
- Fortigate VM Image for KVM
- In my case FortiGate for KVM platform Version 6.2.
- Download from HERE using Fortigate.ONE account (may create for free).
- GNS3 Fortigate Appliance
- Download from HERE.
Note: FortiGate VM evaluation license
FortiGate VM includes a limited embedded 15-day trial license that supports:
- 1 CPU maximum
- 1024 MB memory maximum
- low encryption only (no HTTPS administrative access)
- all features except FortiGuard updates
- You cannot upgrade the firmware, doing so will lock the Web-based Manager until a license is uploaded. Technical support is not included. The trial period begins the first time you start FortiGate VM. After the trial license expires, functionality is disabled until you upload a license file.
Steps
There are only few steps and the process is straightforward:
- Download and save the fortigate VM image.
- Import appliance into GNS3.
- Run a project and use the appliance!
Step 1) Download the Fortigate VM Image
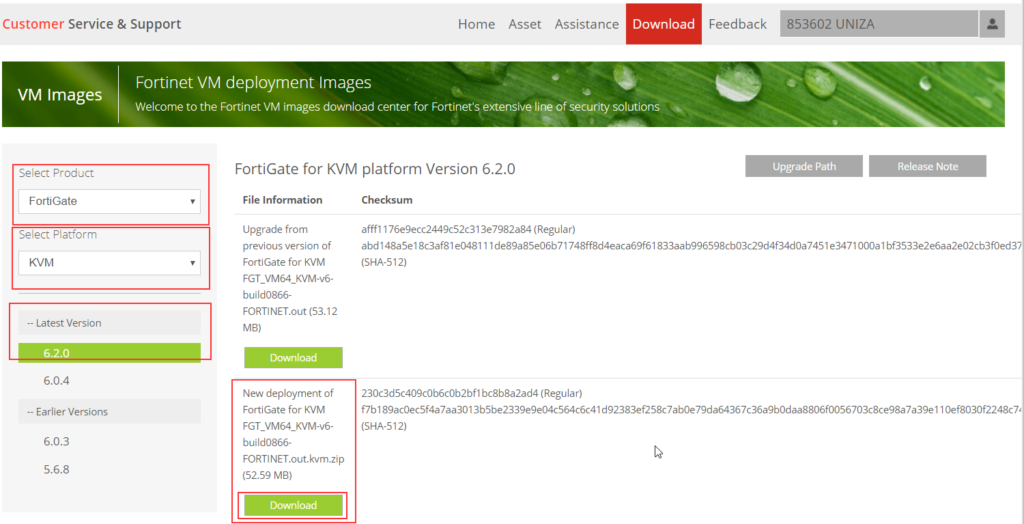
- Go on the Fortinet support page and login. To proceed you need a Fortinet.ONE account (available to create and register for free).
- Then use the menu Download -> VM Images.
- Select Product -> Fortigate
- Select Platform -> KVM and download
- Select version
- And download “ New deployment of FortiGate for KVM …. “ not the „Upgrade from previous version …“
- Downloaded zip file contains the only one file -> fortios.qcow2
- We may uncompress it somewhere on our PC, I prefer your Download folder which the GSN3 appliance will search through.
Step 2) Import the image into GNS3
- Download the GNS3 Fortinet appliance at
https://www.gns3.com/marketplace/appliance/fortigate and place it into your download folder. The file is named fortigate.gns3a. - Start your GNS3 software
- Import the GNS3 appliance, into the GNS3 software. It requires
- Click File and then Import appliance
- Goto your Downloads folder, select the Fortigate appliance and then click Open
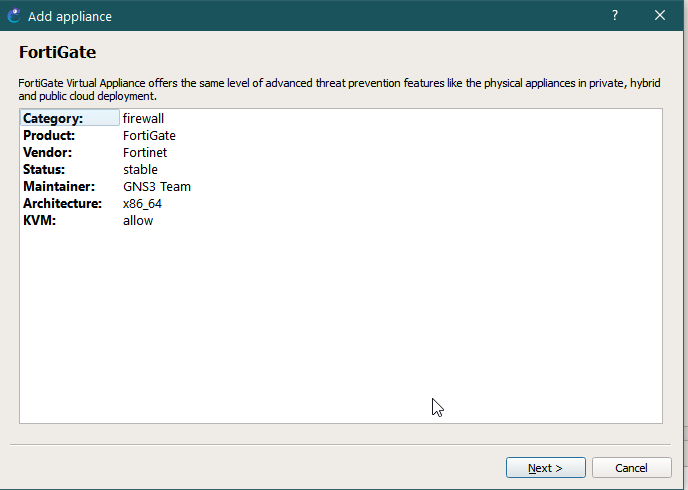
- The Add appliance window will display where click Next
- Now we need to select the Server type used. From the official GNS3 tutorial the GNS3 VM is recommended and it should work. However, we are using remote GNS3 server so only this option is available in our case, so no selection and click Next

- GSN3 will check some requirements and if they are OK, we may click Next
- Now the GNS3 will search various directories, including our Download directory, to attempt to find the correct image ( in our case
fortios.qcow2, which we put there). GNS3 has found it with the version of operating system file.
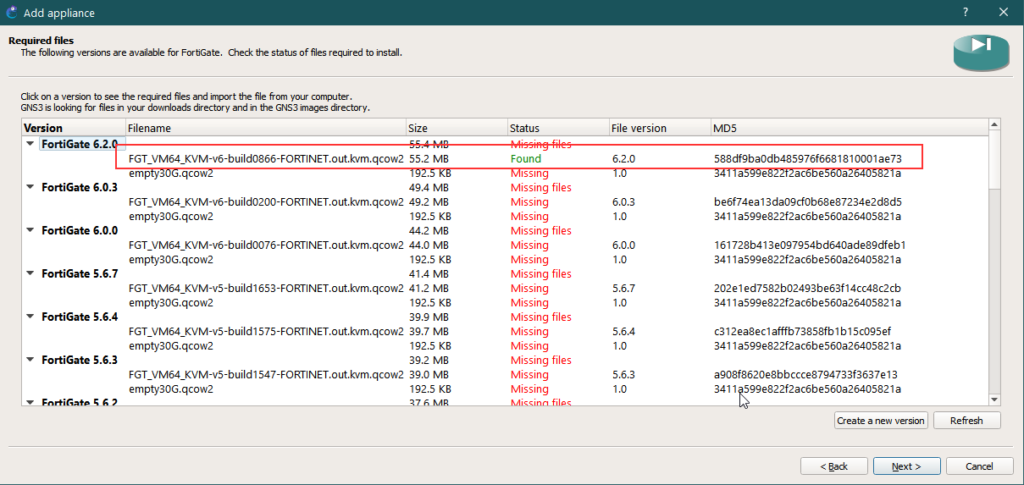
- As we may see, for FortiGate 6.2.0 it found the qcow2 file {the line with FGT_VM….), but the file named „empty30G.qcow2“ is missing.
- Now we cannot proceed, because the import will terminate with the message „Sorry you can not install FortiGate with missing files“.
- Therefore select within of the Add appliance window the line with empty30G.qcow2 file and click on the Download. button (bottom left.) .
- The GNS3 will direct you to the web page, from which we may download the file and save it into Download directory too.
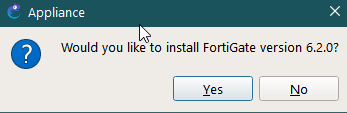
- Now we may select the version of file to install (in our case 6.2.0) and then click Next.
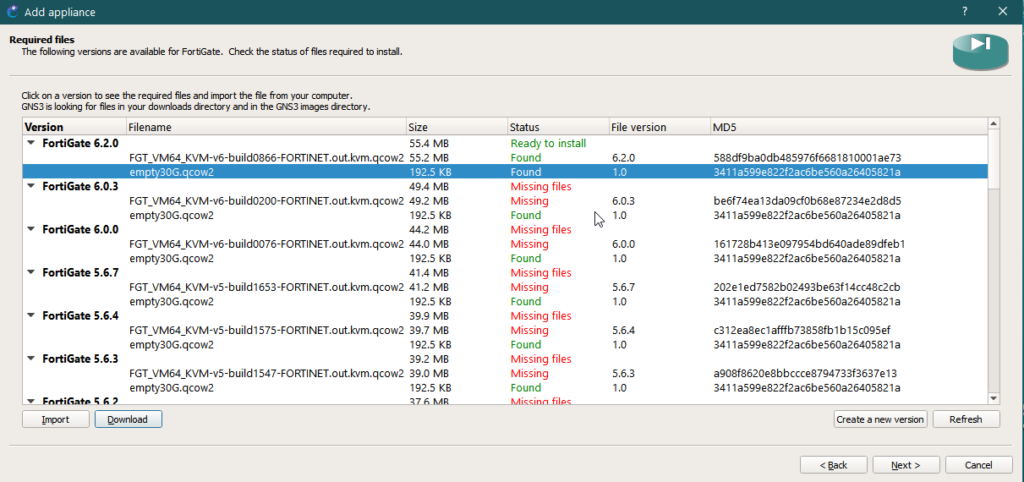
- And then click on Yes
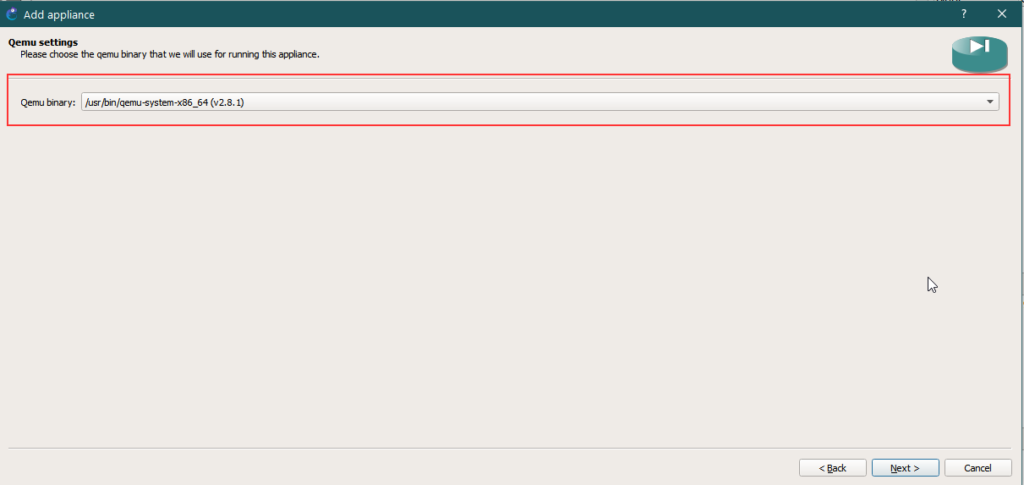
- As the next step GNS3 will ask for the version of Qemu Binary, which is X86_64 in our case
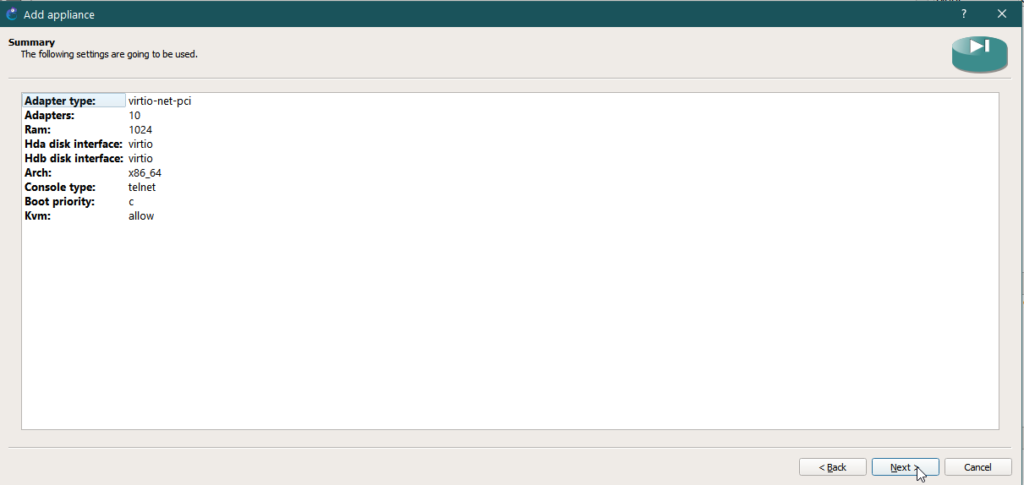
- Inform us about the machine import summary, click Next
- Than it tell us that the machine is using the default username admin with empty password
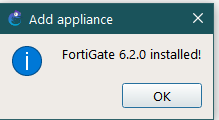
- click Next

- and it finish the import process. Now we have finished.
- The Fortigate VM we may see either between the list of Qemu machine (Edit -> Preferences -> Qemu -> Qemu VMs)
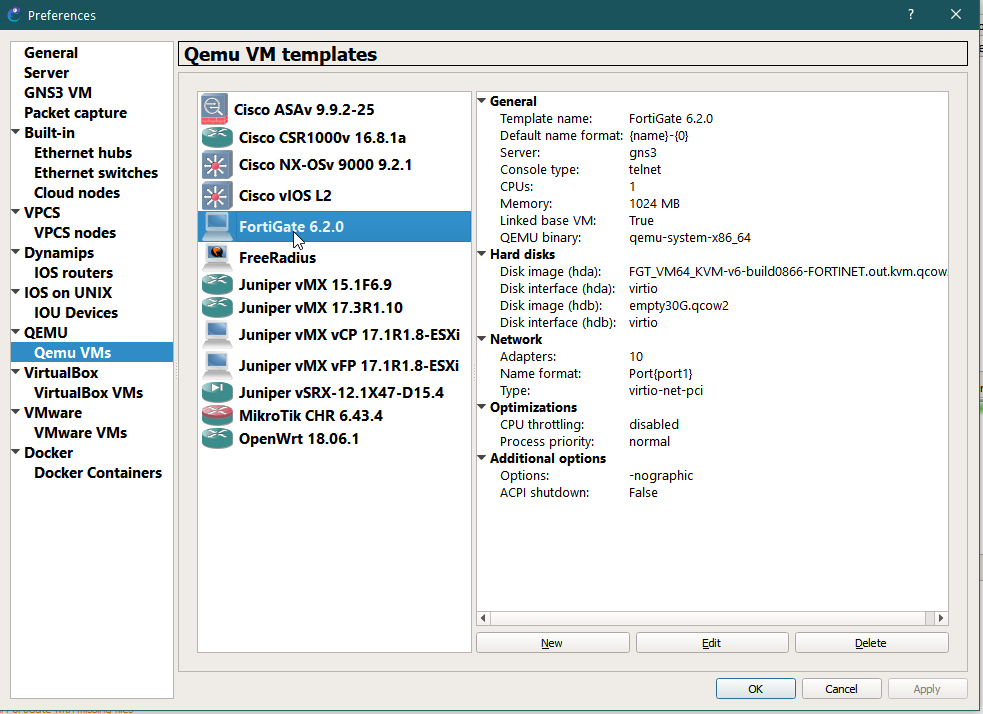
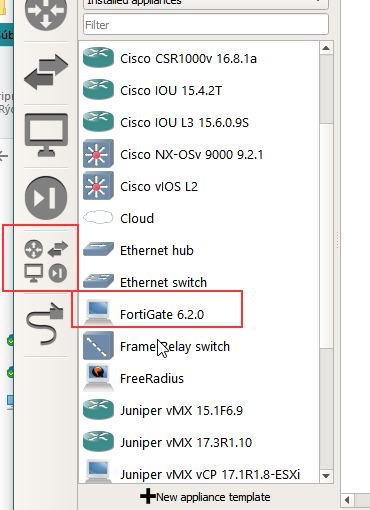
- or between all All devices
Step 3) Run the project and use the appliance!
- Now we may start to use our Fortigate, so open a new project, simply drug the device onto your GNS3 Workspace and start it.
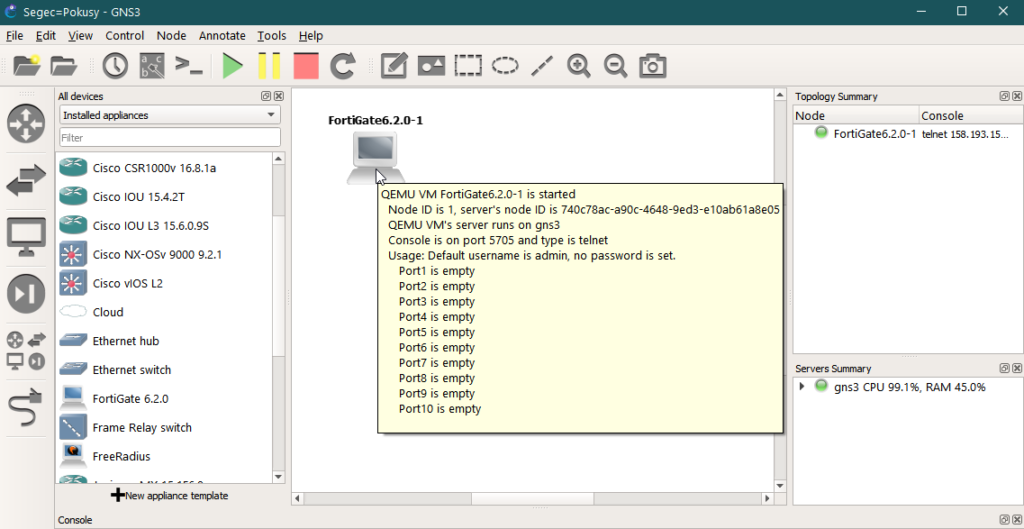
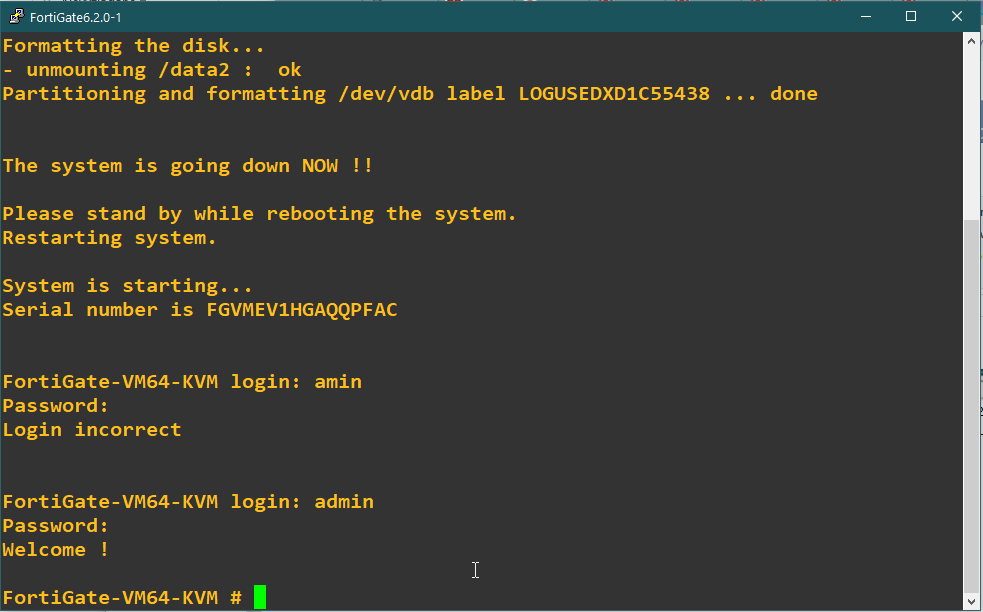
- Opening the console we may see that the FG is booting
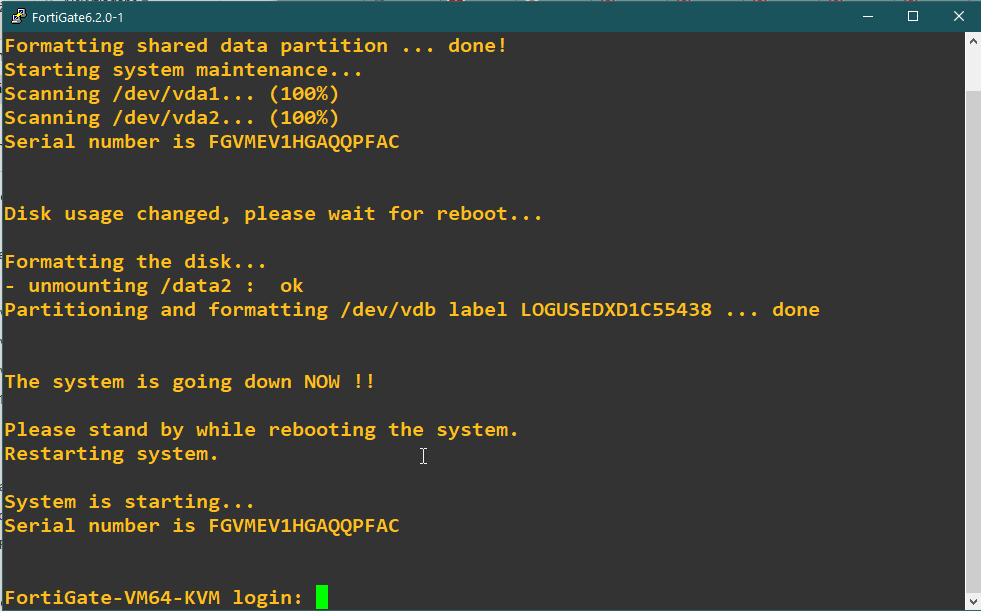
- And after putting correct username/pass (admin and empty) we are in!
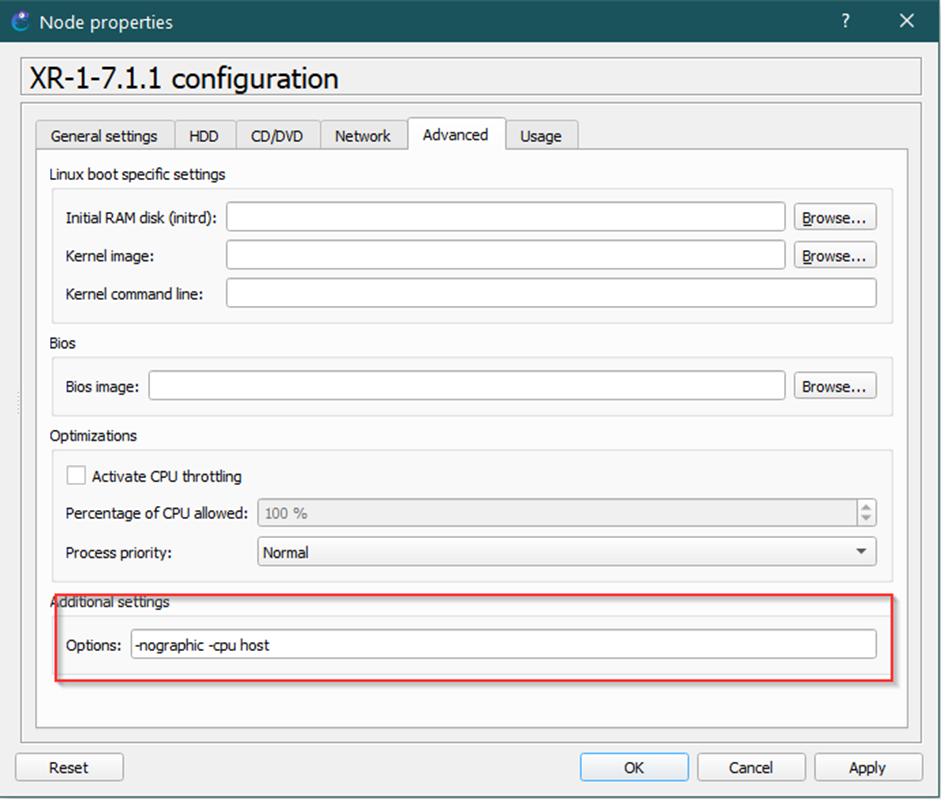
Notes: Once you create a GNS3 project with this Forti VM and you did first login, elapsing 15days the VM will block you and you are unable to login again. However, you may drop/delete VM and create a new one and another 15 days are available again.


I am unable to create vdom
How can I do so ?
I think that VM does not support vdom
I am able to install the fortigate with 6.2 firmware, but when i try using the GUI with the TightVNC Viewer Firefox, i get the login page of the firewall, but it gives me a blank page once i enter the default username and password.
Please do let me know if you have some fix for it. I want to use 6.2 as i would like to prepare for my certification.
Thank you.
I use the ubuntu client, and then launch firefox from the gui. make sure you configure the IP address on port2, and also have the ubuntu box on the same subnet.
Anyone has any luck to set the the FGT license through cli ?
In my GNS3 project, I have a „NAT“ and a „fortigate(FGT)“ linked. Everything is up and running, and I was able to ping my tftp server from the FGT console. But somehow, If I was to try to set up the license on the FGT, it keeps failing. Details:
“
FortiGate-VM64-KVM #
FortiGate-VM64-KVM #
FortiGate-VM64-KVM #
FortiGate-VM64-KVM # exe ping 10.106.6.150
PING 10.106.6.150 (10.106.6.150): 56 data bytes
64 bytes from 10.106.6.150: icmp_seq=0 ttl=59 time=3.9 ms
64 bytes from 10.106.6.150: icmp_seq=1 ttl=59 time=2.5 ms
64 bytes from 10.106.6.150: icmp_seq=2 ttl=59 time=1.2 ms
64 bytes from 10.106.6.150: icmp_seq=3 ttl=59 time=1.5 ms
64 bytes from 10.106.6.150: icmp_seq=4 ttl=59 time=1.4 ms
— 10.106.6.150 ping statistics —
5 packets transmitted, 5 packets received, 0% packet loss
round-trip min/avg/max = 1.2/2.1/3.9 ms
FortiGate-VM64-KVM #
FortiGate-VM64-KVM # execute restore vmlicense tftp FGVM01TM20004104.lic 10.106.6.150
This operation will overwrite the current VM license!
Do you want to continue? (y/n)y
Please wait…
Connect to tftp server 10.106.6.150 …
Connect to tftp server 10.106.6.150 …
Transfer timed out.
Can not get VM license from tftp server via vdom root.
VM license install failed.
Command fail. Return code -39
„.
There is nothing wrong with my tftp server, as it was able to accessed by other device settings.
Any ideas ?
Thanks,
Chun