Microstack is a pure upstream OpenStack distribution. It includes core OpenStack services and the most popular compute, network and storage options. Installation is fast and easy to perform.
My enviroment
- VMware ESXI 6.7.0
- Guest system:
- server install of Ubuntu 20.04.3 LTS
- static public IP address
- 16GB RAM (8GB recommended)
- 4 vCPU
- 100GB of HDD (actual installation with one tiny instace of cirros running takes about 8GB of storage)
Single-node installation steps using snap
Official documentation uses the snap system for installation. The installation, together with initialization, will take about 10 to 30 minutes, depending on your internet speed and HW specification.
Installation steps:
# Update and upgrade system packages
sudo apt update
sudo apt upgrade
Snap should be already installed and available for use on the majority of the latest Ubuntu distributions. If you have any issues regarding Snap, we recommend installing it by using the command below.
# Install snapd
sudo apt install snapd
Guest operating systems running under VMware virtualization have installed a set of tools called open-vm-tools. This project provides a set of useful utilities and drivers to improve the functionality and user experience of virtualization. However, we need to disable this tool for the installation of Microstack to finish successfully.
# Disable open-vm-tools
sudo systemctl disable open-vm-tools.service
We need to reboot the system for changes to apply.
# Reboot system
sudo reboot now
Now we can finally proceed to the actual installation of the Microstack. Official documentation recommends using installation channel beta with dev mode for now. There are many channels and options to be used for installation. To list all of them with descriptions use the command below.
# List all channels and available options
sudo snap install microstack --help

# Install microstack
sudo snap install microstack --devmode --beta

Ensure prerequisites for "microstack" are available
Fetch and check assertions for snap "microstack" (233)
Mount snap "microstack" (233)
Copy snap "microstack" data
Setup snap "microstack" (233) security profiles
Connect microstack:network-bind to core:network-bind
Setup snap "microstack" (233) security profiles for auto-connections
Run install hook of "microstack" snap if present
Start snap "microstack" (233) services
Run configure hook of "microstack" snap if present
Run health check of "microstack" snap
microstack (beta) ussuri from Canonical✓ installed
To verify the installation use the command below. You should see similar output.
# Verification
sudo snap list microstack

Name        Version  Rev  Tracking     Publisher    Notes
microstack  ussuri   233  latest/beta  canonical✓  devmode
After the installation, it is necessary to initialize the Microstack. There are a few options available when initializing. We used the one mentioned and recommended in the official documentation. To list all available options please see the command below.
Important! Make sure that your VM will have the same IP address as was assigned during the initialization process. Once the IP address changes (e.g. after reboot) you may encounter problems. We recommend setting up the IP address statically to avoid issues.
# List all options with descriptions
sudo microstack init --help

# Initialize the microstack
sudo microstack init --auto --controll

2021-10-21 07:57:06,407 - microstack_init - INFO - Configuring clustering ...
2021-10-21 07:57:06,669 - microstack_init - INFO - Setting up as a control node.
2021-10-21 07:57:12,796 - microstack_init - INFO - Configuring networking ...
2021-10-21 07:57:24,152 - microstack_init - INFO - Opening horizon dashboard up to *
2021-10-21 07:57:25,960 - microstack_init - INFO - Waiting for RabbitMQ to start ...
Waiting for 158.193.152.66:5672
2021-10-21 07:57:35,782 - microstack_init - INFO - RabbitMQ started!
2021-10-21 07:57:35,783 - microstack_init - INFO - Configuring RabbitMQ ...
2021-10-21 07:57:37,540 - microstack_init - INFO - RabbitMQ Configured!
2021-10-21 07:57:37,591 - microstack_init - INFO - Waiting for MySQL server to start ...
Waiting for 158.193.152.66:3306
2021-10-21 07:57:49,434 - microstack_init - INFO - Mysql server started! Creating databases ...
2021-10-21 07:57:52,587 - microstack_init - INFO - Configuring Keystone Fernet Keys ...
2021-10-21 07:58:15,239 - microstack_init - INFO - Bootstrapping Keystone ...
2021-10-21 07:58:31,731 - microstack_init - INFO - Creating service project ...
2021-10-21 07:58:42,962 - microstack_init - INFO - Keystone configured!
2021-10-21 07:58:43,018 - microstack_init - INFO - Configuring the Placement service...
2021-10-21 07:59:24,191 - microstack_init - INFO - Running Placement DB migrations...
2021-10-21 07:59:30,592 - microstack_init - INFO - Configuring nova control plane services ...
2021-10-21 07:59:53,117 - microstack_init - INFO - Running Nova API DB migrations (this may take a lot of time)...
2021-10-21 08:00:39,871 - microstack_init - INFO - Running Nova DB migrations (this may take a lot of time)...
Waiting for 158.193.152.66:8774
2021-10-21 08:02:09,087 - microstack_init - INFO - Creating default flavors...
2021-10-21 08:03:01,463 - microstack_init - INFO - Configuring nova compute hypervisor ...
2021-10-21 08:03:01,464 - microstack_init - INFO - Checking virtualization extensions presence on the host
2021-10-21 08:03:01,516 - microstack_init - WARNING - Unable to determine hardware virtualization support by CPU vendor id "GenuineIntel": assuming it is not supported.
2021-10-21 08:03:01,516 - microstack_init - WARNING - Hardware virtualization is not supported - software emulation will be used for Nova instances
2021-10-21 08:03:04,249 - microstack_init - INFO - Configuring the Spice HTML5 console service...
2021-10-21 08:03:05,189 - microstack_init - INFO - Configuring Neutron
Waiting for 158.193.152.66:9696
2021-10-21 08:05:51,571 - microstack_init - INFO - Configuring Glance ...
Waiting for 158.193.152.66:9292
2021-10-21 08:07:02,380 - microstack_init - INFO - Adding cirros image ...
2021-10-21 08:07:08,775 - microstack_init - INFO - Creating security group rules ...
2021-10-21 08:07:29,512 - microstack_init - INFO - Configuring the Cinder services...
2021-10-21 08:09:31,094 - microstack_init - INFO - Running Cinder DB migrations...
2021-10-21 08:09:49,284 - microstack_init - INFO - restarting libvirt and virtlogd ...
2021-10-21 08:10:12,349 - microstack_init - INFO - Complete. Marked microstack as initialized!
Great! Your Microstack is now ready for use. Before we jump into creating our first instance, let’s verify the initialization using the commands below.
# List all available images
microstack.openstack image list

+--------------------------------------+--------+--------+
| ID                                   | Name   | Status |
+--------------------------------------+--------+--------+
| 2a61f2e6-ea86-4161-8ea1-17d0955c0717 | cirros | active |
+--------------------------------------+--------+--------+

# List default flavors
microstack.openstack flavor list

+----+-----------+-------+------+-----------+-------+-----------+
| ID | Name      |   RAM | Disk | Ephemeral | VCPUs | Is Public |
+----+-----------+-------+------+-----------+-------+-----------+
| 1  | m1.tiny   |   512 |    1 |         0 |     1 | True      |
| 2  | m1.small  |  2048 |   20 |         0 |     1 | True      |
| 3  | m1.medium |  4096 |   20 |         0 |     2 | True      |
| 4  | m1.large  |  8192 |   20 |         0 |     4 | True      |
| 5  | m1.xlarge | 16384 |   20 |         0 |     8 | True      |
+----+-----------+-------+------+-----------+-------+-----------+
If you got similar outputs as mentioned above, we can move on and create a VM instance. By default the only OS available for use is cirros. If not specified, a tiny flavor will be used when creating an instance. The command below will launch a VM with the name firstTry, cirros OS, one CPU core, 1 GB HDD and 512 MB RAM (see m1.tiny flavor).
# List all launch options with descriptions
microstack launch --help

# Launch VM instance
microstack launch cirros --name firstTry

Launching server ...
Allocating floating ip ...
Server firstTry launched! (status is BUILD)

Access it with `ssh -i /home/user/snap/microstack/common/.ssh/id_microstack cirros@10.20.20.34`
You can also visit the OpenStack dashboard at http://10.20.20.1:80
There are two ways on how to access the created VM. The first way is with the use of SSH, second is with the use of the WEB dashboard. All information needed to access the VM using SSH are provided when you create the instance. In our case, the command is shown below.
# Access VM using SSH
ssh -i /home/user/snap/microstack/common/.ssh/id_microstack cirros@10.20.20.34
To list every created instance and its corresponding status execute the following command.
# List all instances
microstack.openstack server list

+--------------------------------------+----------+--------+-----------------------------------+--------+---------+
| ID                                   | Name     | Status | Networks                          | Image  | Flavor  |
+--------------------------------------+----------+--------+-----------------------------------+--------+---------+
| 79bd75d0-24be-4ebb-99d1-6a9d2da613c7 | firstTry | ACTIVE | test=192.168.222.195, 10.20.20.34 | cirros | m1.tiny |
+--------------------------------------+----------+--------+-----------------------------------+--------+---------+
If you need more information on OpenStack commands try the command below.
# List OpenStack commands and help
microstack.openstack --help
WEB access
The Microstack installation supports access via cloud dashboard. You can log in to the web UI by pointing your browser to the following URL: http://VM_IP_address
Our IPv4 address was 158.193.152.66 which means that our URL to access the cloud dashboard is: https://158.193.152.66. We are presented with a login screen.

Login credentials are as follows. The username is „admin“ and the password can be obtained by executing the command below.
# Print password for WEB dashboard
sudo snap get microstack config.credentials.keystone-password
In the output, you should see your login password.
# Sample password
OAEHxLgCBz7Wz4usvolAAt61TrDUz6zz
After login, you should be able to see your project overview. Now you can enjoy the functionality of the cloud dashboard.
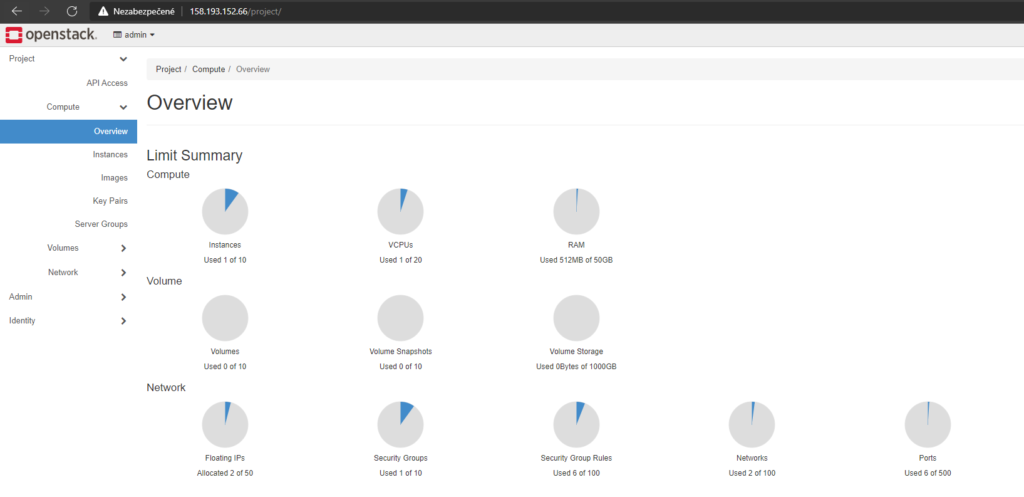
Congratulations! Now you can enjoy your single-node microstack.
Problems
1::
Installation using commands below.
sudo snap install microstack --beta
sudo snap install microstack --classic
sudo snap install microstack --edge

2021-10-21 09:32:45,655 - microstack_init - INFO - Configuring clustering ...
2021-10-21 09:32:49,797 - microstack_init - INFO - Setting up as a control node.
2021-10-21 09:32:59,667 - microstack_init - INFO - Configuring networking ...
Traceback (most recent call last):
  File "/snap/microstack/233/bin/microstack", line 11, in <module>
    load_entry_point('microstack==0.0.1', 'console_scripts', 'microstack')()
  File "/snap/microstack/233/lib/python3.8/site-packages/microstack/main.py", line 44, in main
    cmd()
  File "/snap/microstack/233/lib/python3.8/site-packages/init/main.py", line 60, in wrapper
    return func(*args, **kwargs)
  File "/snap/microstack/233/lib/python3.8/site-packages/init/main.py", line 227, in init
    question.ask()
  File "/snap/microstack/233/lib/python3.8/site-packages/init/questions/question.py", line 210, in ask
    self.yes(awr)
  File "/snap/microstack/233/lib/python3.8/site-packages/init/questions/__init__.py", line 189, in yes
    enable('ovs-vswitchd')
  File "/snap/microstack/233/lib/python3.8/site-packages/init/shell.py", line 162, in enable
    check('snapctl', 'start', 'microstack.{}'.format(service), '--enable')
  File "/snap/microstack/233/lib/python3.8/site-packages/init/shell.py", line 69, in check
    raise subprocess.CalledProcessError(proc.returncode, " ".join(args))
subprocess.CalledProcessError: Command 'snapctl start microstack.ovs-vswitchd --enable' returned non-zero exit status 1.
Solution: Remove the snap installation using
# Remove microstack installation
sudo snap remove microstack
and try the install process mentioned above.
2:: The IP address of guest system has changed
If the IP address on your VM changes, you might encounter some issues. For example, when you initialized your microstack, the IP address of your VM was 10.20.20.87, but for some reason (DHCP or statically on purpose) the actual IP address is now 10.20.20.80. In this case, you may encounter an error message as shown below.
Error message:
sudo microstack.openstack keypair list

Failed to discover available identity versions when contacting http://10.20.20.87:5000. Attempting to parse version from URL.
Could not find versioned identity endpoints when attempting to authenticate. Please check that your auth_url is correct. Unable to establish connection to http://10.20.20.87:5000: HTTPConnectionPool(host='10.20.20.87', port=5000): Max retries exceeded with url: / (Caused by NewConnectionError(': Failed to establish a new connection: [Errno 113] No route to host'))
Solution
Remove the snap installation with
# Remove microstack installation
sudo snap remove microstack
Set the IP address statically.
Install Microstack with the guide above.
3:: open-vm-tools is not disabled
As mentioned in the installation guide above, if you are trying to install Microstack on a guest system running on VMware, the OS is probably running open-vm-tools. If so, you may encounter an error during the installation process.
Start snap "microstack" (233) services                                         |
error: cannot perform the following tasks:
- Start snap "microstack" (233) services (systemctl command [start snap.microstack.load-modules.service] failed with exit status 1: Job for snap.microstack.load-modules.service failed because the control process exited with error code.
See "systemctl status snap.microstack.load-modules.service" and "journalctl -xe" for details.
)
Debugging:
systemctl status snap.microstack.load-modules.service

snap.microstack.load-modules.service
     Loaded: not-found (Reason: Unit snap.microstack.load-modules.service not found.)
     Active: failed (Result: exit-code) since Thu 2021-10-21 09:10:41 UTC; 3min 4s ago
   Main PID: 4408 (code=exited, status=1/FAILURE)

Oct 21 09:10:40 ubuntu systemd[1]: Starting Service for snap application microstack.load-modules...
Oct 21 09:10:40 ubuntu microstack.load-modules[4484]: ++ systemd-detect-virt --container
Oct 21 09:10:40 ubuntu microstack.load-modules[4408]: + [[ none == \n\o\n\e ]]
Oct 21 09:10:40 ubuntu microstack.load-modules[4408]: + modprobe -a vhost vhost-net vhost-scsi vhost-vsock vfio nbd dm-mod dm-thin-pool dm-snapshot iscsi-tcp target-core-mod
Oct 21 09:10:41 ubuntu microstack.load-modules[4486]: modprobe: ERROR: could not insert 'vhost_vsock': Device or resource busy
Oct 21 09:10:41 ubuntu systemd[1]: snap.microstack.load-modules.service: Main process exited, code=exited, status=1/FAILURE
Oct 21 09:10:41 ubuntu systemd[1]: snap.microstack.load-modules.service: Failed with result 'exit-code'.
Oct 21 09:10:41 ubuntu systemd[1]: Failed to start Service for snap application microstack.load-modules.
Solution: Remove the snap installation using
# Remove microstack installation
sudo snap remove microstack
and install Microstack using the guide above.
Note: don’t miss the part where you need to disable open-vm-tools.
4:: NGINX
If your host OS is running NGINX you may encounter an error during initialization.
Error message:
2021-10-25 20:00:20,658 - microstack_init - INFO - Mysql server started! Creating databases ...
Traceback (most recent call last):
  File "/snap/microstack/233/bin/microstack", line 11, in <module>
    load_entry_point('microstack==0.0.1', 'console_scripts', 'microstack')()
  File "/snap/microstack/233/lib/python3.8/site-packages/microstack/main.py", line 44, in main
    cmd()
  File "/snap/microstack/233/lib/python3.8/site-packages/init/main.py", line 60, in wrapper
    return func(*args, **kwargs)
  File "/snap/microstack/233/lib/python3.8/site-packages/init/main.py", line 227, in init
    question.ask()
  File "/snap/microstack/233/lib/python3.8/site-packages/init/questions/question.py", line 210, in ask
    self.yes(awr)
  File "/snap/microstack/233/lib/python3.8/site-packages/init/questions/__init__.py", line 388, in yes
    enable('nginx')
  File "/snap/microstack/233/lib/python3.8/site-packages/init/shell.py", line 162, in enable
    check('snapctl', 'start', 'microstack.{}'.format(service), '--enable')
  File "/snap/microstack/233/lib/python3.8/site-packages/init/shell.py", line 69, in check
    raise subprocess.CalledProcessError(proc.returncode, " ".join(args))
subprocess.CalledProcessError: Command 'snapctl start microstack.nginx --enable' returned non-zero exit status 1.
Solution:
Uninstall Nginx with
sudo apt-get remove nginx
sudo apt-get autoremove
and retry the initialization process.