
The article describes how to run Junos .ova image of the vSRX box within of a virtualbox.
Initial state, prerequisities and requirements
My working environment includes:
- Linux Mint 18.0 64bit
- Virtualbox 5.1.10
- Then we need a junos ova image (60days testing image donwloadable from junox web page|
Steps
Be able to run Junos vSRX within Virtualbox (and probably then in GNS3) I had to do following steps.
1. Direct import of the ova image into VBox does not work, so we need to extract partial parts from the ova file. So go where is your ova image file and then unarchive
tax xvf NAME.ova
in my case
tar xvf media-srx-ffp-vsrx-vmdisk-15.1X49-D15.4.ide.ova
within the folder several new files appears including .pem, .cert, . vmdk, .mv, .ovf
ls -al

total 6872984
drwxr-xr-x 2 palo palo       4096 Dec 14 14:56 .
drwxr-xr-x 3 palo palo       4096 Dec 14 15:14 ..
-rw-r--r-- 1 palo palo       3684 Jul 31  2015 certchain.pem
-rw-r--r-- 1 palo palo       2474 Jul 31  2015 media-srx-ffp-vsrx-vmdisk-15.1X49-D15.4.cert
-rw-r--r-- 1 palo palo 2156756992 Jul 31  2015 media-srx-ffp-vsrx-vmdisk-15.1X49-D15.4-disk1.vmdk
-rw-r--r-- 1 palo palo        253 Jul 31  2015 media-srx-ffp-vsrx-vmdisk-15.1X49-D15.4.mf
-rw-r--r-- 1 palo palo      50948 Jul 31  2015 media-srx-ffp-vsrx-vmdisk-15.1X49-D15.4.ovf
-rw-r--r-- 1 palo palo 2156820480 Nov  5  2015 media-srx-ffp-vsrx-vmdisk-15.1X49-D15.4.ide.ova
2. Direct import or either attachment of vmdk disk file does not work. So it have to be converted to vdi. So we will convert .vmdk to vdi. To do that type (just a note: my target file has different name):
vboxmanage clonehd -format VDI media-srx-ffp-vsrx-vmdisk-15.1X49-D15.4-disk1.vmdk junos-vsrx-15.1X49.vdi
3. Now start the VBox and create a new virtual machine. My working settings are:
General:Name: JunOS-v-srx-15.1
Type: BSD (Linux work too)
Version: FreeBSD64 (Other Linux works too)
System:
Motherboard Memory: at least 3GB, 4GB is recomended (I had 2048 MB and it did not work) (Note: (http://www.juniper.net/techpubs/en_US/vsrx15.1×49/topics/reference/general/security-vsrx-vmware-system-requirement.html )) Enable I/O APIC Change Chipset from PIX3 to ICH9 Processor CPU: 2 (must be, otherwise does not work)
Enable PAE/NX Acceleration
Enable VT-x/AMD-V Enable Nested Paging Storage Hard Drive: IDE Primary master
Use already created file vdi file, in my case junos-vsrx-15.1X49.vdi Audio:
Off
Network I had set up: Attached to: Not attached, then go to Avanced and as the adapter type you must select Paravirtualized Network (virtio-net)
Serial Ports
Enable Serial Port 1
Port Number: COM1
Port Mode: Disconnected
That is all! Now we may boot the machine and start to played with.
Just a note, if we wish tu use it within GNS3, this is just one system and we need to make clones be able to create topologies with more as one router.


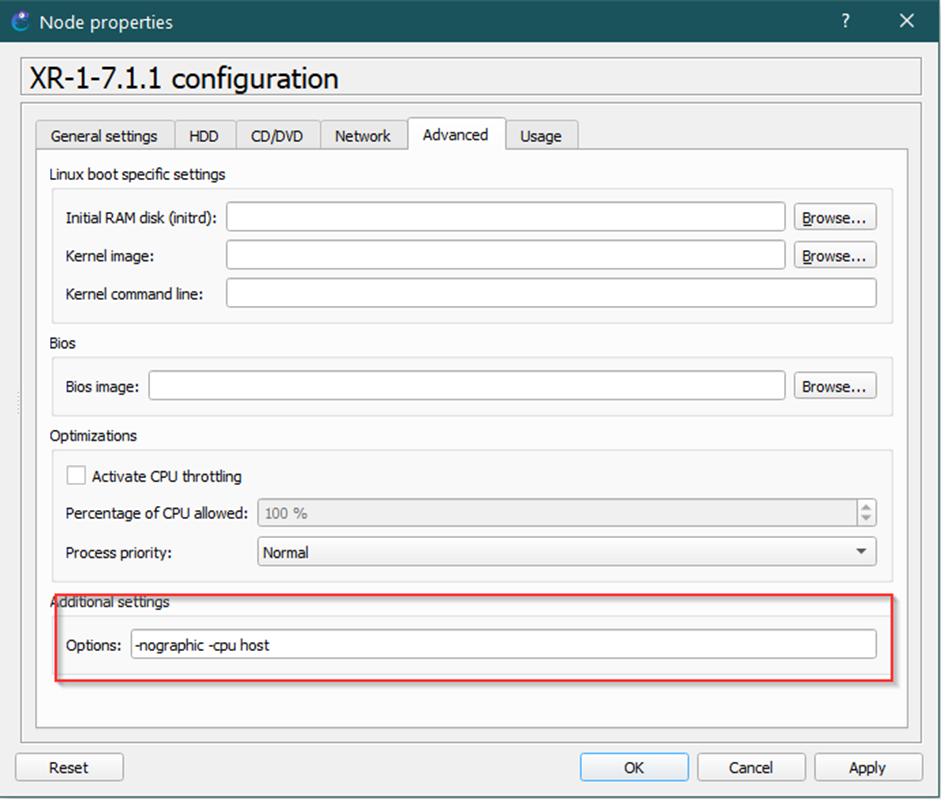


I have been trying this with more recent 15.1 and 18.4 images and it still works. For the VirtualBox configuration, I have one more suggestion: Under system, set the Chipset to ICH9.
If you leave the chipset at PIIX (which is Virtualbox default setting), the VM’s take multiple hours to boot and they just keep hogging your CPU.
thanks, i did it!
Thanks a lot for this post. It helped me a lot