
This article explain how to make a JunOS router running inside of a qemu virtual machine in the win 7 64bit environment. The Junos qemu machine is planned to be used inside of GNS3. The tutorial is based on different sources which I have to go through, for example:
- Olive reloaded or how to emulate Juniper routers
- Installing Juniper router OS JunOS 10.1 in Qemu(VM) for GNS3
- Installing Olive 12.1R1.9 under Qemu
Inside each of them I found parts which does not work straightforwardly for different reasons (which experienced user should solve, but i'm a qemu, bsd and junos newbie).
Prerequisities:
- Installed GNS3, my version is 0.8.6 for 64bit Win 7. Download here.
- Installed Qemu, 0.11 Win 32 in my case. Download here. Qemu release 13.0 has a SEAbios bug, which lead to problem boot Junos routers. Compilation of a new SEAbios is required. I observed mentioned problem for qemu 0.13 win 32 downloaded from GNS3 site.
- Created, installed and running FreeBSD Qemu machine. (tutorial is using 32bit FreeBSD).
- Some JunOS image. Download somewhere. I'm using jinstal-9.6. This version does not allow to follow steps described in Installing Olive 12.1R1.9 under Qemu tutorial (is unable to comment check_arch_compatibility() function as it is not inside of required +INSTALL and +REQUIRED files, available for junos version 10 and higher).
- Some free sFTP/SSH server for windows, for example FreeSSHd server, Download here. We need sftp service which allow us download junos package from windows to qemu machine.
Installation steps
- Making a copy of clear qemu FreeBsd image (just to have backup).
- Installing JunOS with modified signature hashes.
Making a copy of a clear Qemu image with freeBSD
At the beginning we make a copy of our running and clean qemu image with installed FreeBSD inside of it (tutorial here). Therefore go to the folder where your qemu is installed and where the clear source image is also located. Then simply make a copy (and paste) of original qemu image, next rename it, here for example olive-base.img.
Installing JunOS
To follow this step we need running qemu image with installed FreeBSD, tutorial is here.
Now we will install JunOS (10R) on our olive img. So start your fresh, just installed Qemu FreeBSD machine:
qemu -m 512 -hda olive-base.img -boot c -localtime \
-net nic,macaddr=00:aa:00:60:01:01,model=e1000 -net user
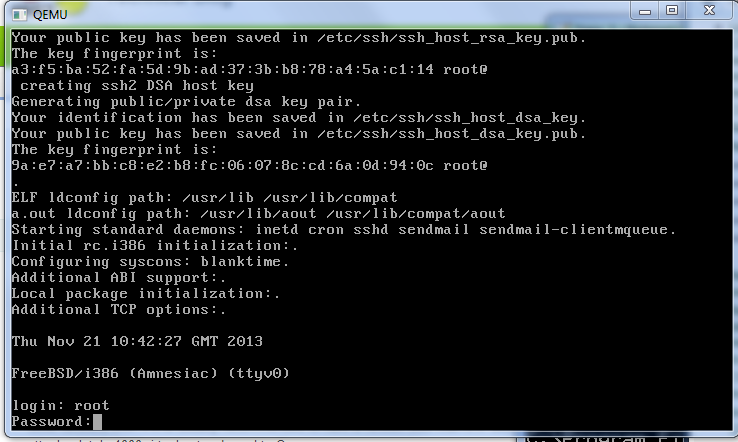
the command tells Qemu to start Qemu disk with single network e1000 interface (with mentioned MAC address). The Qemu should start and load installed FreeBSD, where we have to be able login as root using our root password:
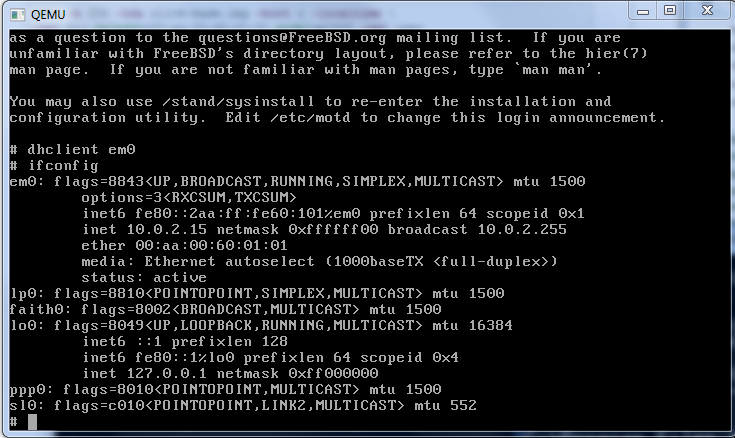
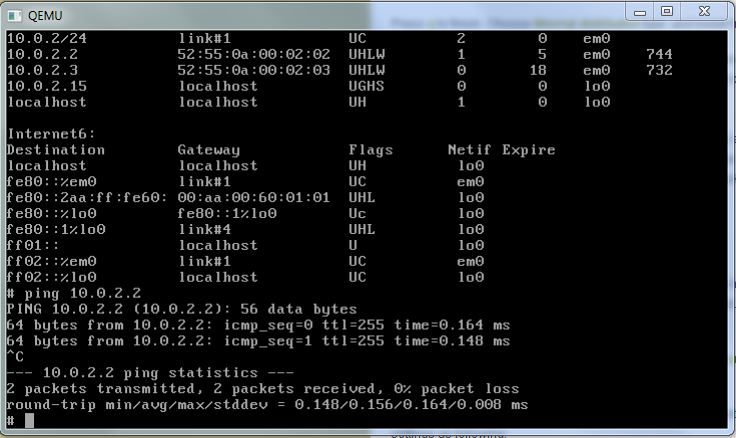
Now we have to obtain an IP address typing:
dhclient em0
The command assigns to the interface em0 the IP address 10.0.2.15/24 and create a static route 0.0.0.0/0 to the default gateway 10.0.2.2.
We verify it with
ifconfig
and routing with
netstat -r
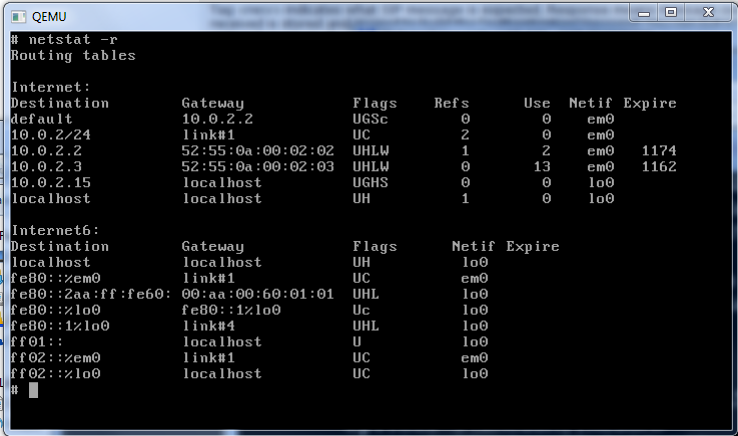
Quite strange but there is a NAT connection between the guest and host system and we should be able to ping or transfer file without any difficulties. Try
ping 10.0.2.2
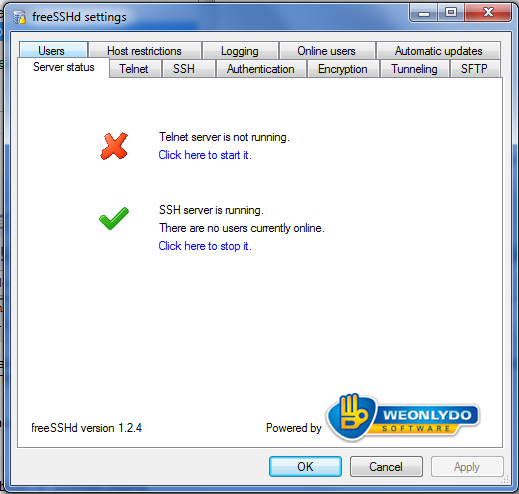
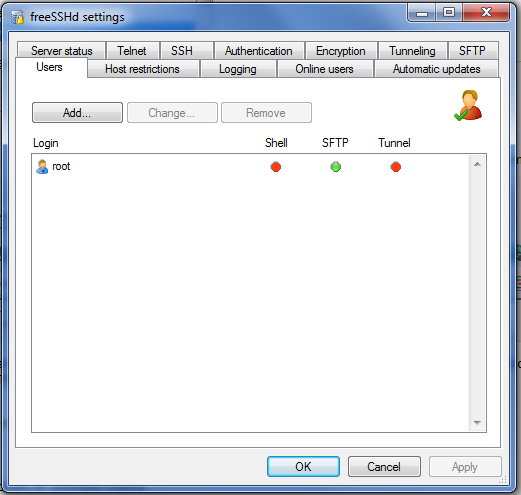
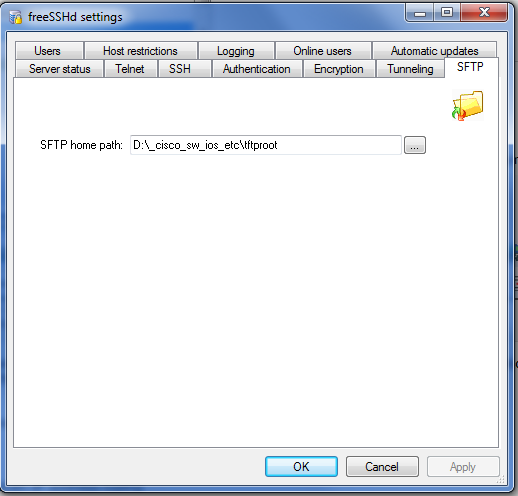
Now we have to start our windows sFTP server, in a case of FreeSSHd, it have to be installed, runnig and at least one user have to have account created, SFTP have to point out to the directory, where Junos file is stored:
We shoud check if our windows sftp service (freeSSHd) is running:
account is created
and the home folder with junos tgz package is setting up
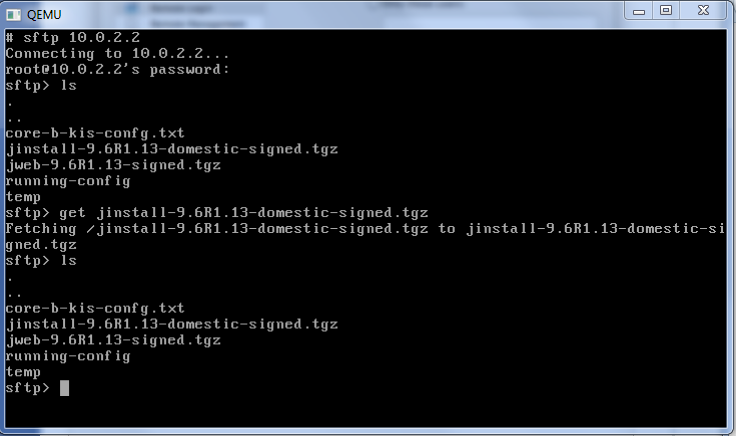
then we should be able log in from the qemu freebsd to our SFTP server inside of windows using sftp command:
sftp 10.0.2.2
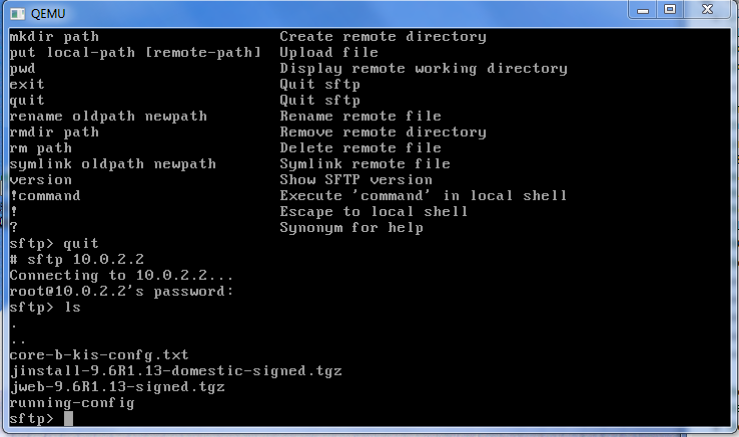
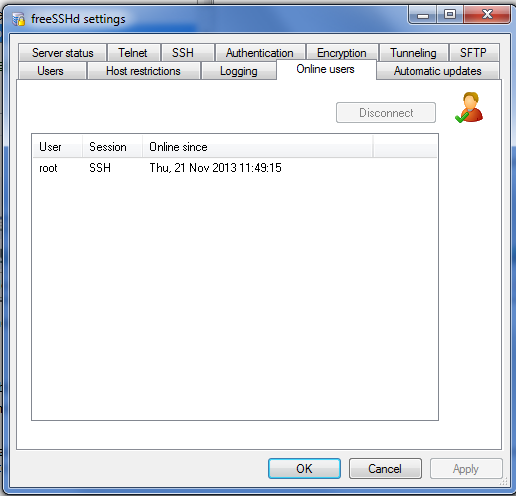
inside of the freeSSHd we may see, that we are sucesfully loged in:
then we may download requested Junos file (in my case jinstall-9.6R1.13-domestic-signed.tgz)
get JUNOS _PACKAGE_NAME
i.e.
get jinstall-9.6R1.13-domestic-signed.tgz
Note from excelent tutorial (blog.gns3.net/2009/10/olive-juniper/):
The jinstall file after 7.4 version has a binary called checkpic. This binary will fail and the image cannot be installed. Replacing this binary with /usr/bin/true fixes the issue. Also, it is needed to recalculate MD5 and SHA1 checksums before archiving them back.
Here I'm providing fixed steps because one of best guides (Olive reloaded or how to emulate Juniper routers) has this part misleading and with erros (openssh instead of openssl, bad file names and paths ..)
cd /var/tmp
mkdir jinst-signed
cd jinst-signed
pwd
/var/tmp/jinst-signed
tar zxvf ../jinstall-9.6R1.13-domestic-signed.tgz

mkdir jinst
cd jinst
pwd
/var/tmp/jinst-signed/jinst
tar zxvf ../jinstall-9.6R1.13-domestic.tgz

mkdir pkgtools
cd pkgtools
pwd
/var/tmp/jinst-signed/jinst/pkgtools
tar zxvf ../pkgtools.tgz

cd bin
! just be sure type pwd
pwd
/var/tmp/jinst-signed/jinst/bin
cp /usr/bin/true ./checkpic

cd ..
pwd
/var/tmp/jinst-signed/jinst/pkgtools
tar zcvf ../pkgtools.tgz *
cd ..
rm -rf pkgtools

tar zcvf ../jinstall-9.6R1.13-domestic.tgz *
cd ..
pwd
/var/tmp/jinst-signed

rm -rf jinst

! create md5 and sha1 keys for new package
md5 -q  jinstall-9.6R1.13-domestic.tgz > jinstall-9.6R1.13-domestic.tgz.tgz.md5
openssl sha1 jinstall-9.6R1.13-domestic.tgz > jinstall-9.6R1.13-domestic.tgz.sha1
then open the jinstall-9.6R1.13-domestic.tgz.sha1 file and delete from the first line name of the file, just keep the sha1 hash
vi jinstall-9.6R1.13-domestic.tgz.sha1
exit vi and tar all files and keys into a new package, named olive
tar zcfv ../jinstall-9.6R1.13-domestic-olive.tgz *
cd ..
next delete everything unusable, because seems that 4G bytes Qemu HDD is for Junos 10 so small
rm -vf ./jinst-signed
rm jinstall-9.6R1.13-domestic-signed.tgz
then we may install modified olive package
pkg_add -f ./jinstall-9.6R1.13-domestic-olive.tgz
The package installation takes a few minutes, and after sucess, we have to reboot the qemu machine with "halt" BSD command. After our machine was shut down, close the qemu window (or pres Ctrl Alt 2).
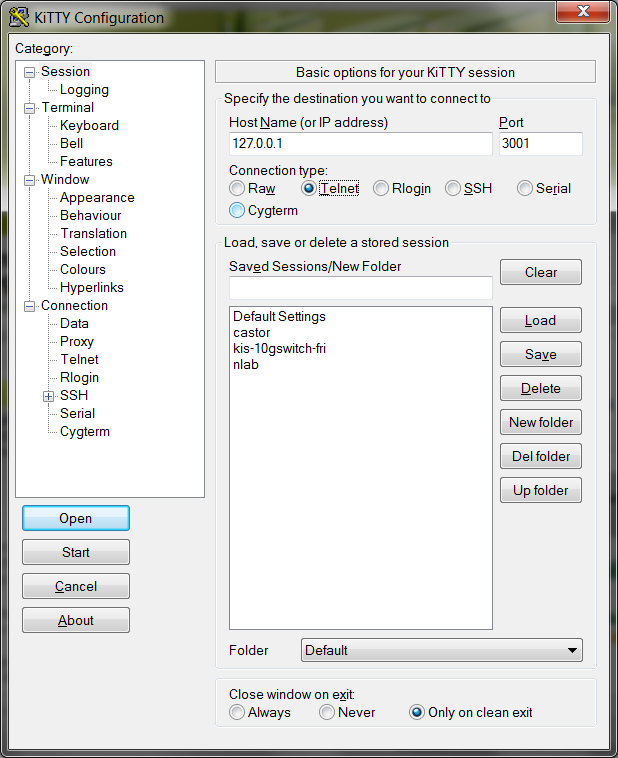
Now we have to complete main junos installation process. This require booting the junos router image. Be able to start and observe the installation process we redirect output to the telnet server, port 3001, and also we initiate the image booting just after telnet login:
qemu.exe -m 1G -hda olive-base.img -serial \
telnet:0.0.0.0:3001,server
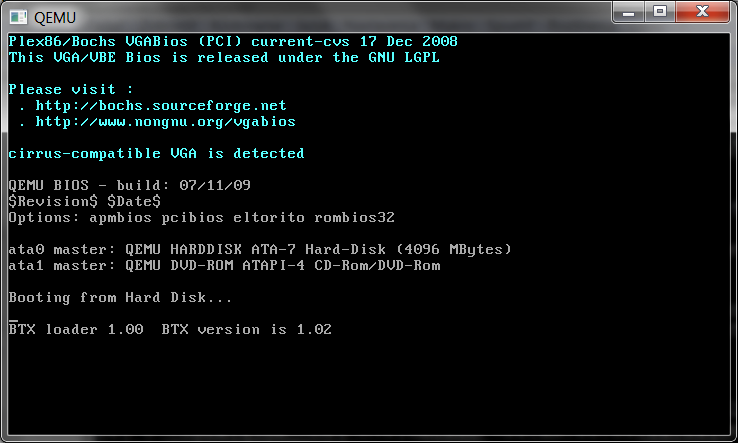
and as the next step (required to start installation) we have to use putty\kitty\telnet to make a telnet session on localhost, port 3001
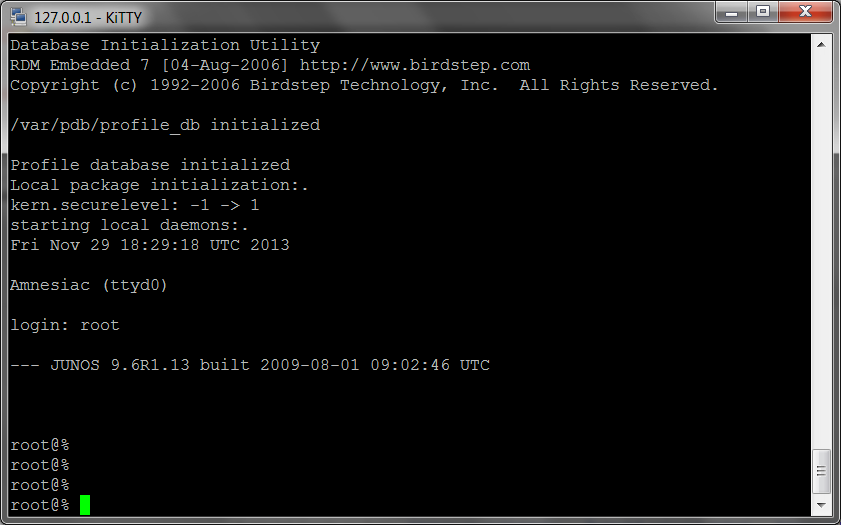
Using telnet we are able observe the output from boot and install process. During the junos installation process qemu machine may reboot many, we have to patiently (looks there is no activity, but be patient, we may observe that image size is growing) wait for the end (from couple of minutes to tens of minutes, depends on the amount of emulated RAM and HW performance).
Finally, we get the login prompt (hura)
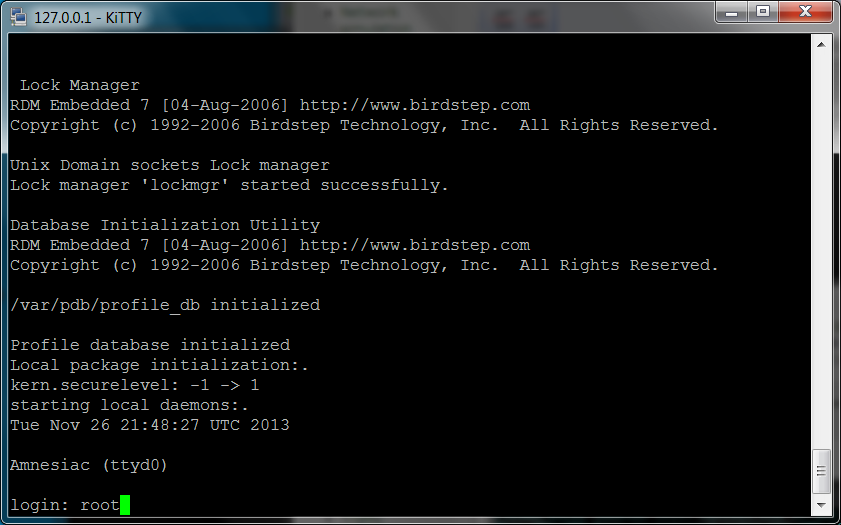
and after login as root we should run
cli
which provide us with Junos prompt
Troubleshooting
For first time I have used Qemu 0.13. Till to reboot just after junos package installation evrything is going well. After reboot following error appear (dog error – reset of uninitialized watchdog):
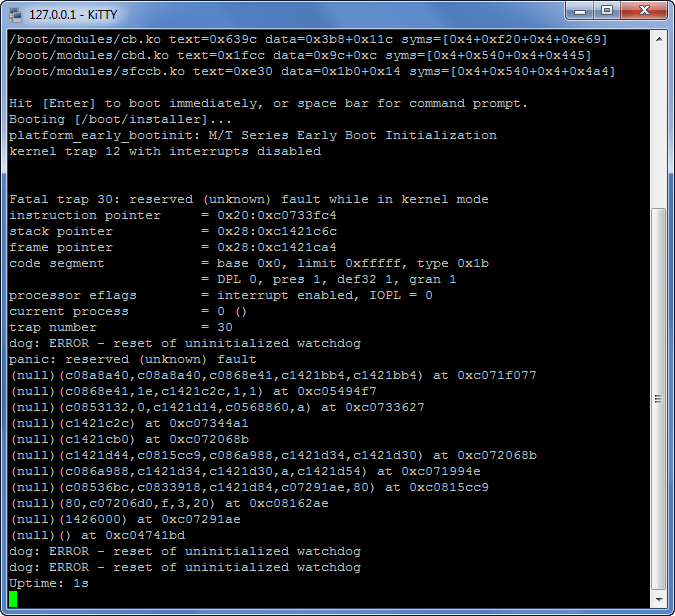
Surfing web I found (here and here) that :
You may download a already compiled version of this bios.
Alternatively you can compile your own modified version of the SeaBIOS.