Note 2019-10: This guide was made for an older verion of sipcapture and actual guide is available at https://www.sipcapture.org/
Description: Homer is an Open Source SIP Capture server by Alexandr Dubovikov & Friends, based on OpenSER/Kamailio and supporting HEPv1/v2 (Homer Encapsulation Protocol) & IP proto 4 (IPIP) encapsulation and monitoring/mirroring port capture modes. Homer ships with a flexible and lightweight capture agent for unsupported scenarios and a powerful browser based UI (webHomer).
Web:
http://sipcapture.org/
http://code.google.com/p/homer/
To fulfill installation tasks we will need Kamailio with sipcapture module enabled, mysql server, apache server wuth php support and enabled rewrite rules, homer webgui.
Topology
Image will come soon
Installing capture node (Kamailio with Mysql)
The capture server of the Homer capture solution is an application, which collects all SIP messages in HEP/IPIP protocols from your capture agents (other Kamailio servers in our case). The capture server is based on the Kamailio server, therefore we first need to install Kamailio 3.2 server with MySQL support.
The sipcapture module should be a part of the main kamailio package. So we have two options, install kamailio with mysql modules from repository or manually compile kamailio and all required packages from GIT. In a case of manual compilation, there have to be mysql and sipcapture module enabled (make modules-cfg include_modules=”db_mysql sipcapture”). For an installation ovreview look at the article about installing the Kamailio server from GIT.
Download homer files
During next steps we will require some files provided inside of homer and kamailio source files, so we will download it. In a case of manual compilation and installtion this step is probably done.
mkdir homer
cd homer
Get a local copy of the homer repository with this command:
git clone https://code.google.com/p/homer/
cd ..
mkdir kamailio32
cd kamailio32
git clone --depth 1 git://git.sip-router.org/sip-router kamailio
Copy Homer capture config file
Now copy the example kamailio.cfg from kamailio/modules/sipcapture/examples/ to yours default kamailio’s config directory. i.e /usr/local/etc/kamailio/ if you install it from git or /etc/kamailio if it was installed from repository, open it and change:
cd /etc/kamailio/
cp <YOUR_PATH_TO_KAMAILIO_SOURCE>/kamailio32/kamailio/modules/sipcapture/examples/kamailio.cfg kamailio.cfg
Modification of kamailio.cfg file
Open kamailio.cfg file and change appropriate fields to reflect your installation (mainly IP address)
# here should be your ip and port on which the capture server listen on
listen=udp:158.193.139.49:5060

# credentials to access mysql db, where all messages collected
modparam("sipcapture", "db_url", "mysql://homer_user:homer_password@localhost/homer_db")

# if you have more then one node set capture_node name
# this name will be used in mysql, field node
modparam("sipcapture", "capture_node", "homer03")

#activate HEP capturing
modparam("sipcapture", "hep_capture_on", 1)
Check if config file containts line with requested modules
loadmodule "pv.so"
loadmodule "db_mysql.so"
loadmodule "sipcapture.so"
loadmodule "textops.so"
and start the kamailio to check if everything is oK
/etc/init.d/kamailio start
Starting Kamailio:
loading modules under /usr/local/lib64/kamailio/modules_k/:/usr/local/lib64/kamailio/modules/
Listening on
             udp: 158.193.139.49:5060
Aliases:
             udp: homer:5060
             udp: homer.sip.uniza.sk:5060

kamailio started.
Creation of Mysql database tables
Create a homer database (homer_db)
root@homer:/# mysql -u root -p
Enter password:
mysql> create database homer_db;
mysql> connect homer_db;
mysql>
and paste script from http://code.google.com/p/homer/source/browse/sql/create_sipcapture.sql
Then create an DB user with privileges to reflect your kamailio.cfg configuration
CREATE USER 'homer_user'@'localhost' IDENTIFIED BY 'homer_password';
GRANT ALL PRIVILEGES ON homer_db.* TO 'homer_user'@'localhost';
then open kamailio.cfg and modify line
modparam("sipcapture", "db_url", "mysql://homer_user:homer_password@localhost/homer_db")
finally restart the kamailio service.
Installing homer web interface
Install apache web server with php5 and mysql support
apt-get install apache2 apache2-doc php5 php5-mysql php5-gd
Enable rewrite.load for your apache. Enabling rewrite mode for my Apache 2 means add symlink from /etc/apache2/mods-available into /etc/apache2/mods-enabled. Alternativelly we enable apache rewrite mode with following command
a2enmod rewrite
Without this we are not able to use homer webgui web after installation.
Then download latest homer webgui files
cd /home/palo/
wget http://homer.googlecode.com/files/webhomer3_2_3.tgz
go to the www folder
cd /var/www
and extract homer gui files here
tar xvfz /home/palo/webhomer3_2_3.tgz
Now create a database for a homer
root@homer:/# mysql -u root -p
Enter password:
mysql> create database homer_users;
and fill it with homer_users.sql from webhomer/sql folder (downloaded in webhomer3_2_3.tgz).
root@homer:/var/www# mysql -u root -p homer_users < /var/www/webhomer/sql/homer_users.sql
Copy
cp configuration_example.php configuration.php
cp preferences_example.php preferences.php
Create a user to access this database and define him in the configuration.php
/* Access db of homer users */
define(HOST, "localhost"); define(PORT, 3306);
define(USER, "root");
define(PW, "root");
define(DB, "homer_users");
then define username and password for HOMER db (made a few steps before). This user must be defined in all your nodes DB. Don’t forget to insert all your nodes into homer_nodes table.
/* Homer connection
*  this user must have the same password for all Homer nodes
*  please define all your nodes in homer_nodes table
*/

define(HOMER_HOST, "localhost"); define(HOMER_PORT, 3306);
define(HOMER_USER, "homer_users");
define(HOMER_PW, "homer_password");
define(HOMER_DB, "homer_db");
define(HOMER_TABLE, "sip_capture");
Modifying Apache configuration
Do not forget to modify apache config file to allow loading index.php file as the homer webgui is written in php language. So open apache’ default config file
vim /etc/apache2/sites-enabled/000-default
and add into line with DirectoryIndex (labeled with green) within Directory block (labeled with yellow) words index.php. The whole config should look like:
<VirtualHost *:80>
        ServerAdmin webmaster@localhost

        DocumentRoot /var/www
        <Directory />
                Options FollowSymLinks
                AllowOverride None
        </Directory>
        <Directory /var/www/>
                Options Indexes FollowSymLinks MultiViews
                AllowOverride None
                DirectoryIndex index.php index.html
                Order allow,deny
                allow from all
        </Directory>

        ScriptAlias /cgi-bin/ /usr/lib/cgi-bin/
        <Directory "/usr/lib/cgi-bin">
                AllowOverride None
                Options +ExecCGI -MultiViews +SymLinksIfOwnerMatch
                Order allow,deny
                Allow from all
        </Directory>

        ErrorLog ${APACHE_LOG_DIR}/error.log

        # Possible values include: debug, info, notice, warn, error, crit,
        # alert, emerg.
        LogLevel warn

        CustomLog ${APACHE_LOG_DIR}/access.log combined

    Alias /doc/ "/usr/share/doc/"
    <Directory "/usr/share/doc/">
        Options Indexes MultiViews FollowSymLinks
        AllowOverride None
        Order deny,allow
        Deny from all
        Allow from 127.0.0.0/255.0.0.0 ::1/128
    </Directory>

</VirtualHost>
Have to be noted, that it is default apache config.
Finally restart apache with /etc/init.d/apache restart
First Login
Open your preferred browser and point out to webhomer folder, in my case homer.sip.uniza.sk/webhomer/
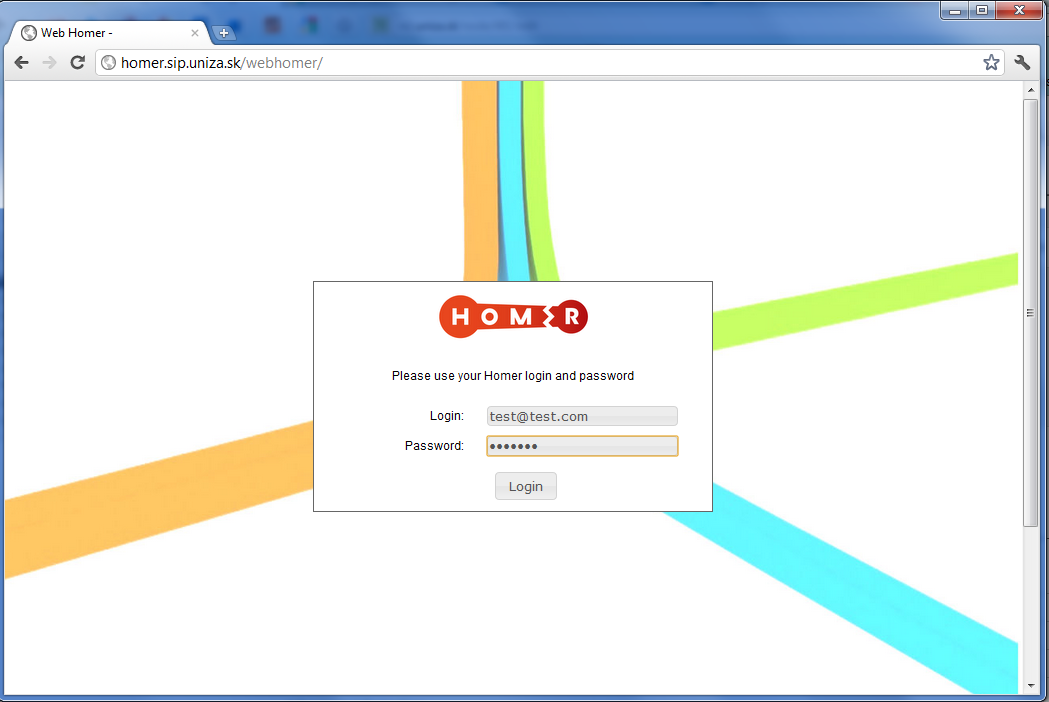
and using the default login credentials test@test.com/test123 we should be able login
Modyfying accounts/passwords
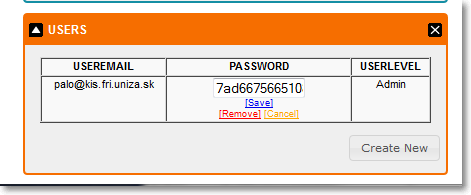
To modify/delete existing account or add a new account you have to click on Admin menu and drag Users button from left part of the page and drop it somewhere on page.

where user config panel will appear. It should look like.
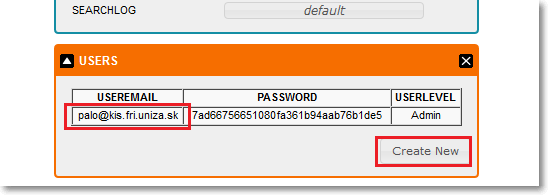
Clicking on existing accocunt we may modify it:
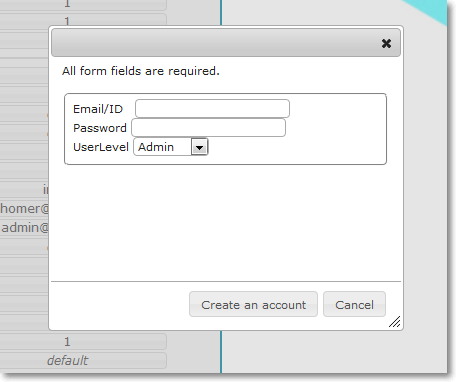
Clicking on the Create buton we may create a new user:
Enable statistics
First, extend homer_db with statistic tables
mysql -u root -p homer_db < /var/www/webhomer/sql/statistics.sql
then enable statistics module, so open preferences.php file
vim /var/www/webhomer/preferences.php
look through for lines
/* Modules Options */
define(MODULES, 0);  /* Set to 1 Enable Statistic Modules */
and change to
define(MODULES, 1);
Next we have to setup cron to run statistics collection script. I have small problem to locate statistic.pl srcipt required by official HowTo. finally I’ve make a git clone of homer project
git clone https://code.google.com/p/homer/
and there I’ve found required scripts folder with statistic.pl script. So copy the statistic.pl file to the /usr/local/sbin/ folder.
Then open the file and edit database parameters:
$mysql_table = "sip_capture";
$mysql_dbname = "homer_db";
$mysql_user = "homer_user";
$mysql_password = "homer_password";
$mysql_host = "localhost";
and prepare crontab, for example put the following line into crontab file:
*/5 * * * * root /usr/local/sbin/statistic.pl
Finally check permission rules for /usr/local/sbin/statistic.pl file. They have to allow script execution. It should look like
 ls -al /usr/local/sbin/statistic.pl
-rwxr-xr-x 1 root staff 5798 Dec 20 10:07 /usr/local/sbin/statistic.pl
If not, run
chmod 755 /usr/local/sbin/statistic.pl
Installing/enabling capture agent
Kamailio
SIP capture functionalities are builded into core kamailio. We have to only load required module, initialized them with appropriate parameters and modify routing logic. We do it with directives which allow us to simply switch on/off this functionalities:
First, define WITH_HOMER directive
#!define WITH_HOMER
then move to loadparam section of your kamailio.cfg and paste there
#!ifdef WITH_HOMER
loadmodule "siptrace.so"
#!endif
Take care that the siptrace module is loaded after loading mysql and tm modules!
As a next step we will configure parameters of the module:
#!ifdef WITH_HOMER
# check IP and port of your capture node
modparam("siptrace", "duplicate_uri","sip:158.193.139.49:5060");
modparam("siptrace", "hep_mode_on",1);
modparam("siptrace", "trace_to_database",0);
modparam("siptrace", "trace_flag",22);
modparam("siptrace", "trace_on", 1);
#!endif
Finally we modify main routing logic. Look for line with “route{” and add
#!ifdef WITH_HOMER
        #start duplicate the SIP message now
        sip_trace();
        setflag(22);
#!endif
Adding capture agents
Capture agents have to be added as nodes in homer_users DB (table homer nodes). It can be realized through webhomer GUI. We have to click on Admin menu and drag Nodes button from left part of the page and drop it somewhere on page.
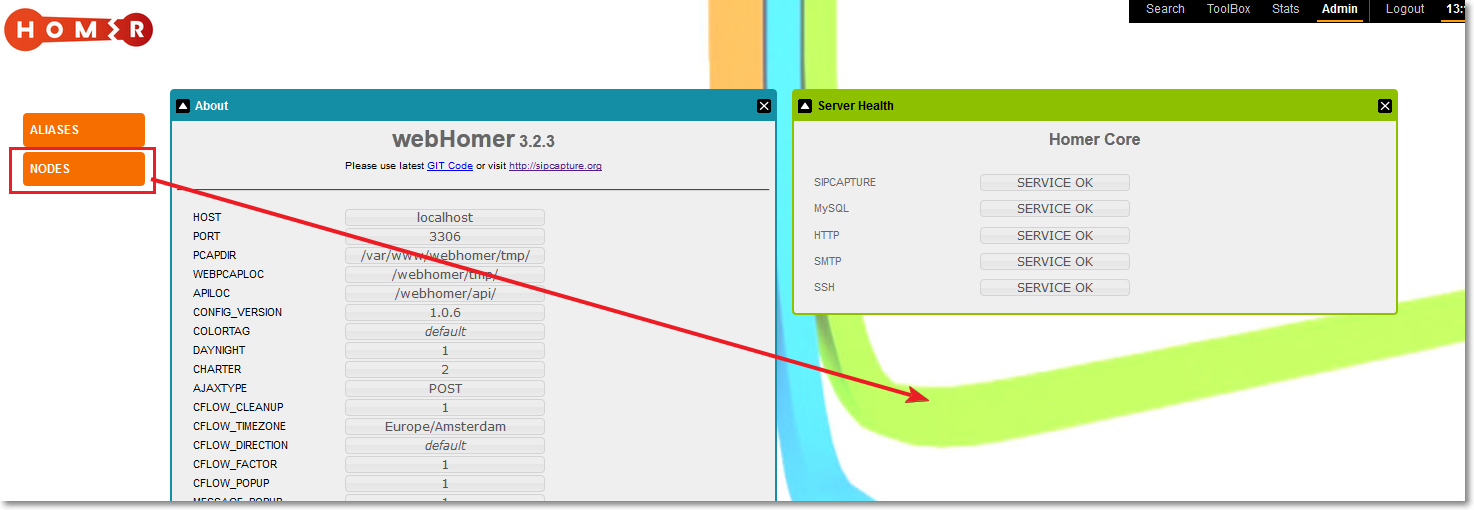
where nodes window willa appear:
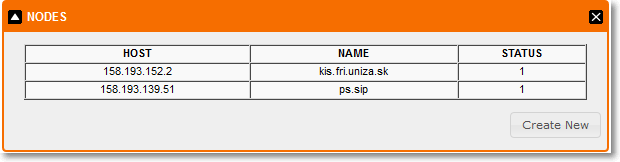
Where HOST means IP address of capture agent and name is its name unde which we are able to see its statistics and SIP messages.
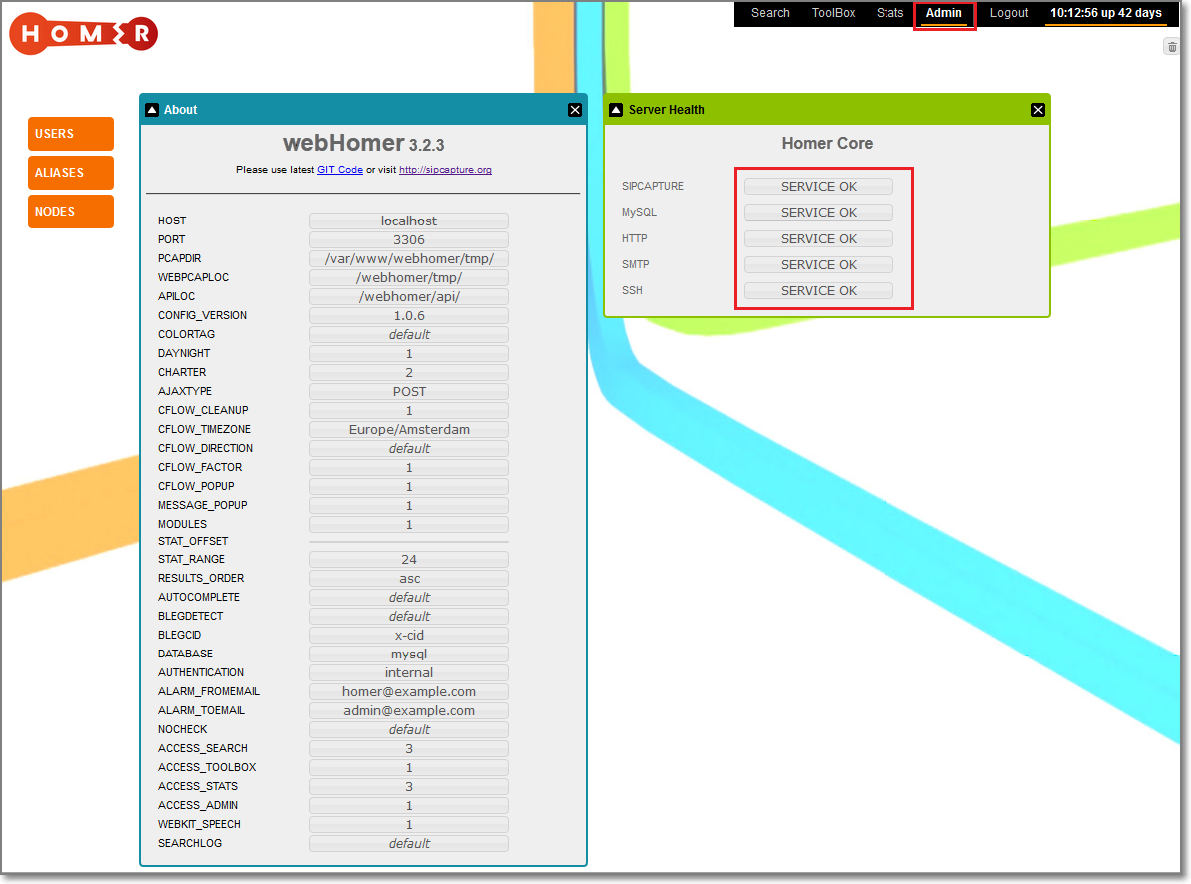
Testing
Checking of required services
If everything is OK we should be able login to homer webgui and check admin status of required services, where inside of all fields have to be OK
Monitoring verification
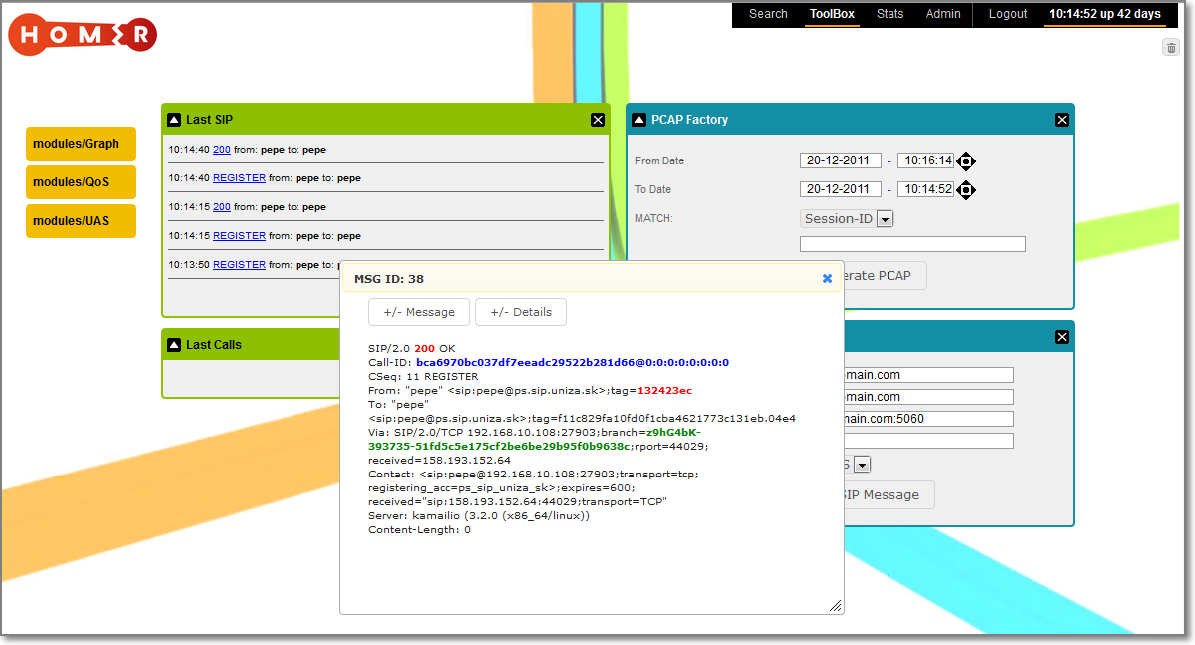
If everything is working, after login to webhomer, we are able to see captured sip messages: